
Do you want to add a stunning image gallery to your WordPress website?
A gallery lets you showcase images in a visually appealing manner, making your website more engaging for visitors.
Galleries can help you tell a story or convey a message through images. Whether you’re documenting an event, showcasing your portfolio, or sharing customer testimonials, galleries can make the content stand out.
In this tutorial, we’re going to show you how to easily add a gallery to your website – no coding, and in under 10 minutes!
What You Need to Create a WordPress Image Gallery
The WordPress block editor (Gutenberg) has a built-in feature for creating image galleries, making it easy to showcase your photos or visual content on your website. You can select multiple images, upload them to your media library, and insert them into a gallery block with just a few clicks.
But this feature is limited in how you can customize the gallery. You’ll find yourself wanting more control over the layout, styling, and behavior of your galleries.
This is where image gallery plugins step in. They offer a wider range of features and customization options compared to the default WordPress gallery.
This includes additional gallery layouts, lightbox effects, image filters, social media integration, and more. These enhanced features can help you create more visually appealing and interactive galleries on your website.
The most important thing here is choosing the right WordPress image gallery plugin.
We recommend Envira Gallery.

Envira Gallery is hands down the best WordPress Gallery Plugin. It’s easy to install and comes with an intuitive drag-and-drop builder that makes it easy to create and customize galleries without any coding knowledge. You can simply drag images or videos into the gallery, rearrange them, and adjust settings with ease.
Choose from a range of gallery layouts, including grid, masonry, justified, slideshow, and more. Each layout is customizable, so you can adjust the number of columns, image spacing, and other settings to fit your needs.
You can even add a customizable lightbox effect, providing an elegant way for users to view images in full-screen mode without leaving the page.
Here’s an example of the lightbox effect, so when you click on any image in the WordPress photo gallery, it opens up in a lightbox.

The galleries are fully responsive, meaning they will adapt seamlessly to different screen sizes and devices, including desktops, tablets, and smartphones.
Added to all this, there are features for image protection, including watermarking and password protection, to help prevent unauthorized use of your images.
Want to make it easy for users to share? The plugin comes with built-in social sharing buttons, allowing visitors to easily share your images and galleries on popular social media platforms.
The Envira Gallery plugin is compatible with all popular WordPress themes, page builders, e-commerce platforms, and other third-party services. So you won’t have to worry about these issues on your site.
Here are the highlights of the Envira Gallery Plugin
- Create beautiful photo and video galleries
- Comes with pre-built templates
- Responsive Mobile Friendly
- Social Media Integration
- Image proofing, password protection, watermarks
- WooCommerce integration
- Deeplinking and pagination
That said, let’s get started with creating the image gallery.
How to Create an Image Gallery in WordPress
This method will take you about 10 minutes and you’ll never have to touch coding to create and customize your gallery.
Step 1: Install Envira Gallery
Installing Envira Gallery on your WordPress website is a straightforward process. There’s a free plugin available in the WordPress plugin repository.
In your WordPress dashboard, go to the Plugins » Add New page and search for ‘Envira’ here. Now you can install and activate the plugin on your site.
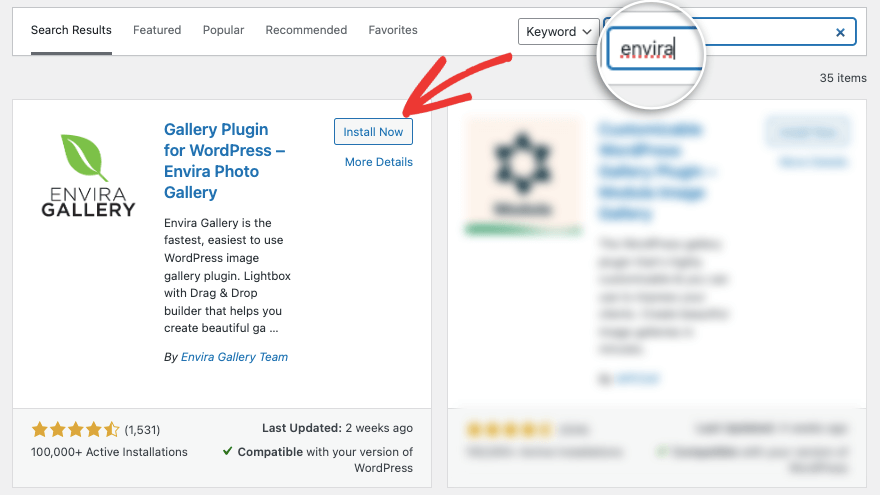
This gives you access to the free version that has all the essential features you need to create a gallery on your site.
For this tutorial, we’ll be using the pro version to show you what this plugin is truly capable of.
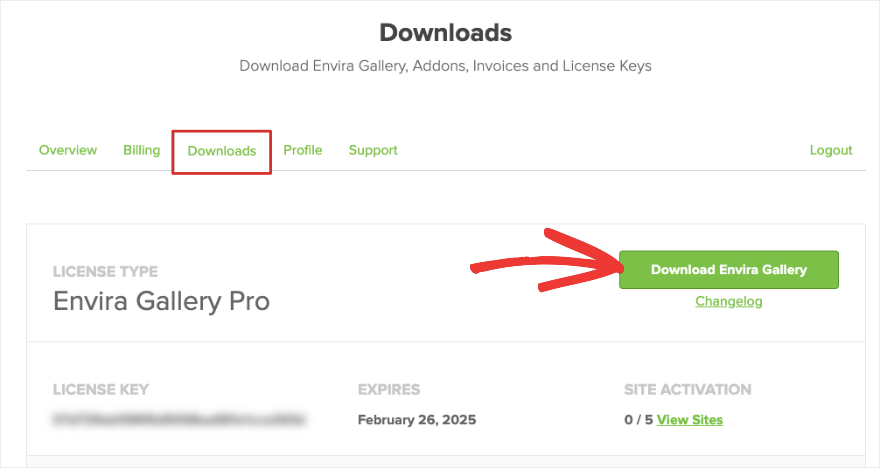
To get the pro plugin, head over to the Envira Gallery website. Select your plan and sign up for an account. Inside your account, you’ll get a plugin file to download along with a license key you can copy.
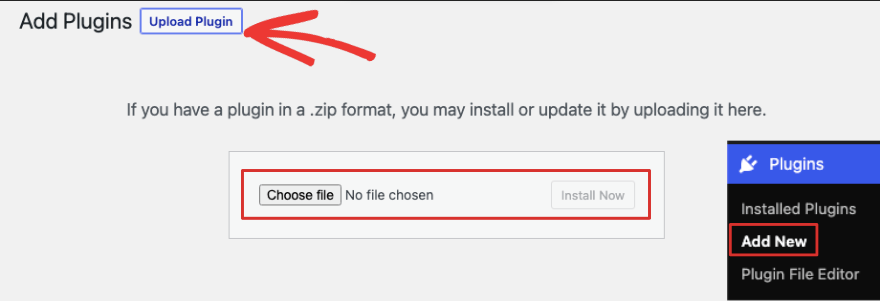
Head over to your WordPress admin panel, and upload the plugin under Plugins » Add New » Upload Plugin option.
Once you’ve activated the plugin, add the license key under the Envira Gallery Settings page.
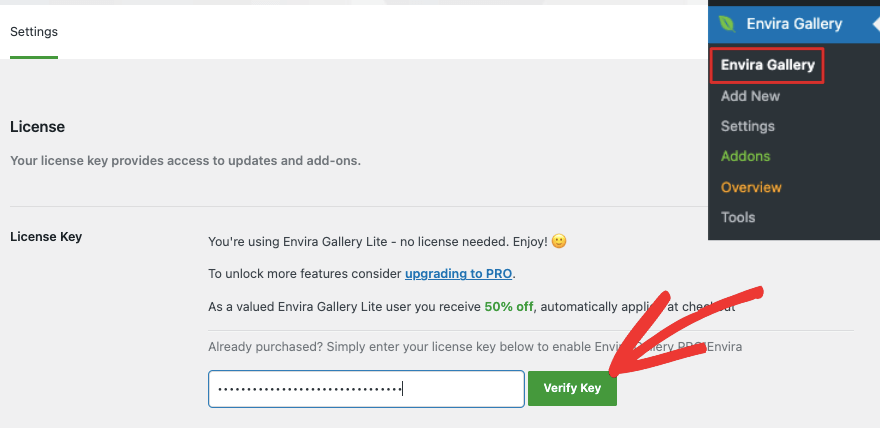
Now you’re ready to create your first image gallery.
Step 2: Add a New Gallery
Navigate to the Envira Gallery menu in your WordPress dashboard. Here you can choose the “Add New” button to create a new gallery.
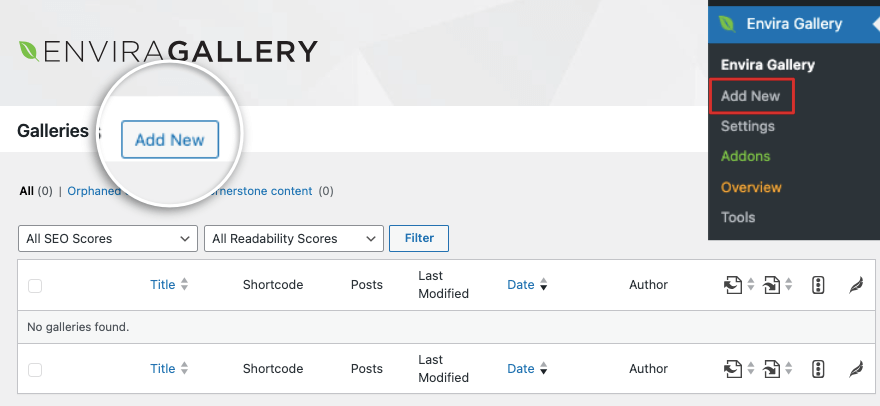
This will open up the image gallery builder. The builder is designed to be similar to the WordPress interface so there’s no learning curve to it.
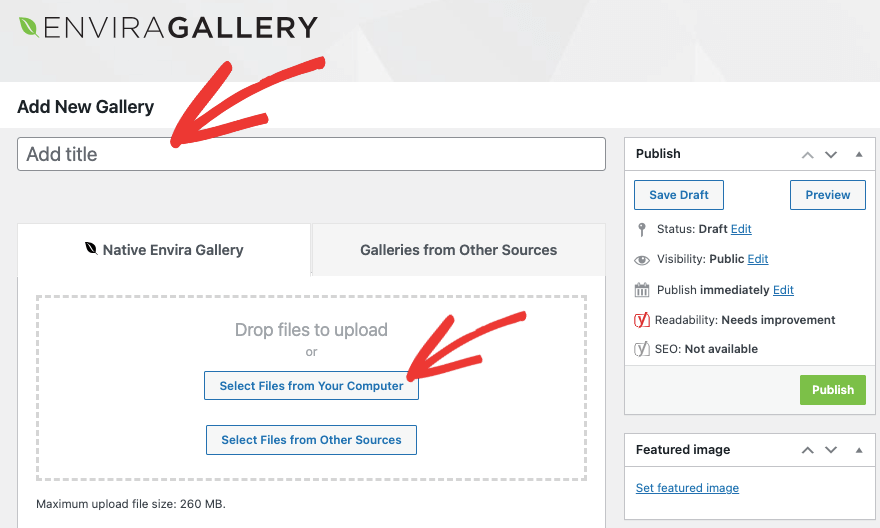
First, let’s add a title for your gallery. Then select images you want to add. You can either upload images from your computer or from other sources.
Now you should see the images you’ve uploaded appear below this section like so:
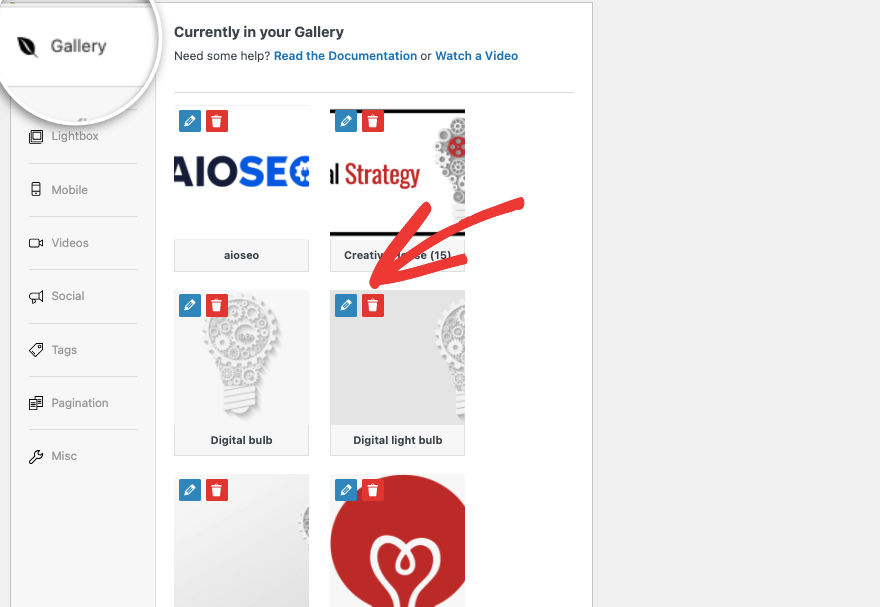
You can choose to edit or delete photos here.
For every image, you can
There’s also a settings menu on the left, so let’s explore that more.
Step 3: Configure Image Gallery Settings
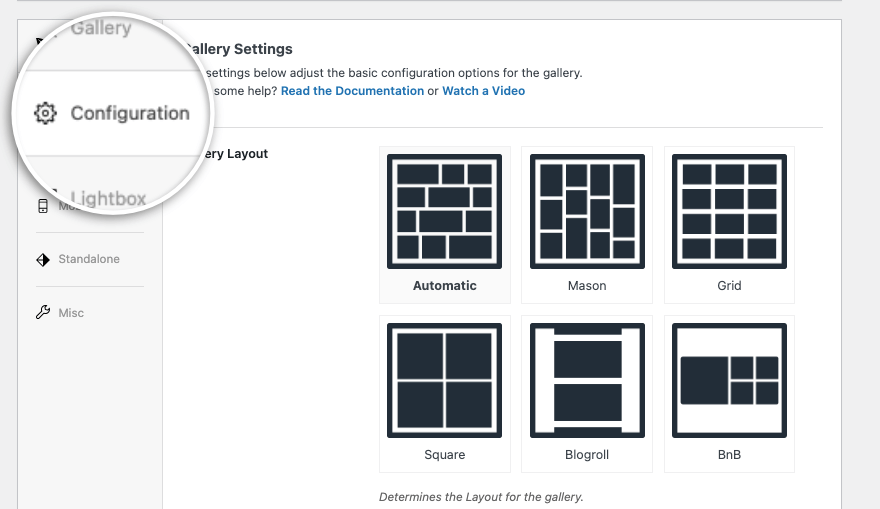
Under the Configuration tab, you can choose the gallery layout you want for your images. You can let Envira automatically display the images in the best possible layout.
If you’re using specific dimensions for your photos, then you may prefer mason, grid, square, or BnB. If you want your users to be able to infinitely scroll through images, then the Blogroll template is the best.
If you scroll down the page, you’ll get more options to optimize the gallery. First, there’s lazy loading. By enabling this, Envira gallery will load thumbnails only when they are visible on the user’s screen. This will help improve page load time and user experience.
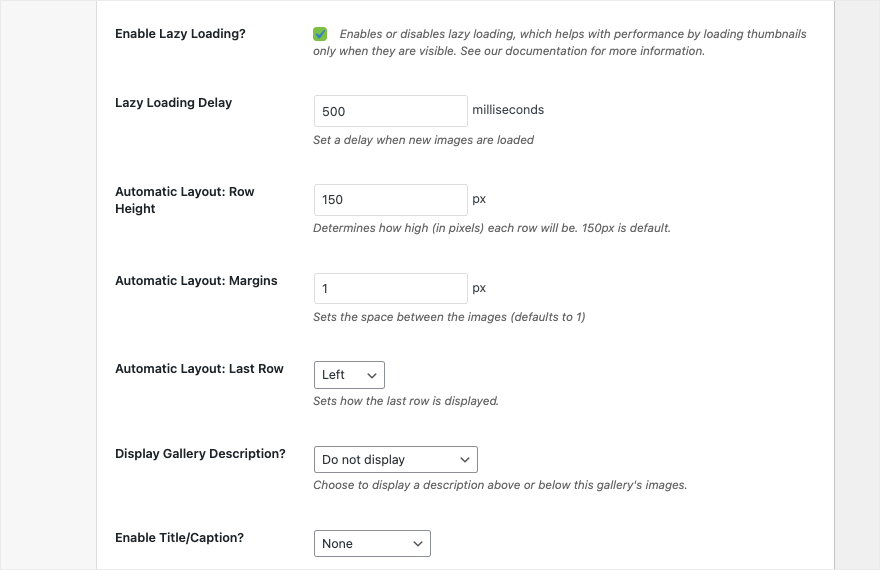
You also get options to set the row height and margins, show/hide the gallery description, title, and more. When you make changes here, Envira automatically saves them.
Moving on to the next Lightbox tab, you can enable or disable the lightbox effect in your gallery with just a click.

You can select what kind of base you want for the lightbox, whether you want to show the title or caption, and the image size.
You also get the option to display arrows at the sides of the images so that people can navigate to the previous or next image easily.
Under the Mobile tab, you can adjust settings to make sure your gallery is responsive. Keep in mind that you don’t need to tweak these settings as Envira galleries are automatically adjusted to different screen sizes. Make changes here only if absolutely necessary.
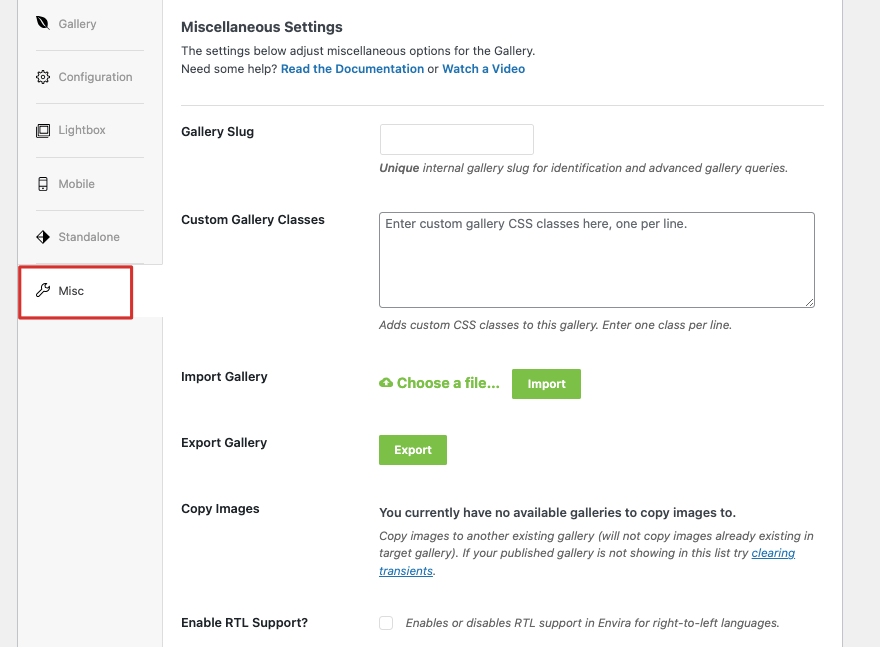
Next, under the Misc tab, you can add a slug for your gallery and add custom CSS classes. You can also import and export your gallery.
That’s about it! All that’s left to do is publish your newly created gallery.
Step 4: Publish the Image Gallery
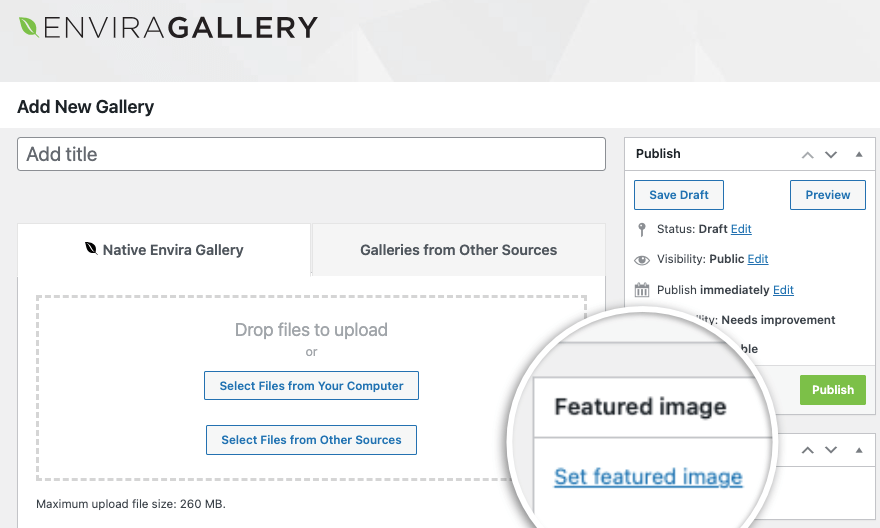
On the same page, scroll to the top and you’ll see a menu on the right that’s similar to the WordPress post edit screen. You can set a featured image just like you would for a blog post. Then you can save the gallery as a draft, preview it, and publish it.
Once you hit the publish button, the gallery will go live on your site. That’s it. You’ve learned how to create a stunning image gallery in WordPress.
Every gallery you create comes with a shortcode to ‘insert gallery’ anywhere on your website including new pages, posts, and sidebars.
Envira Gallery also has its own readymade widget inside the block editor. You can simply add a new block and search for ‘Envira’ and you’ll see it pop up.
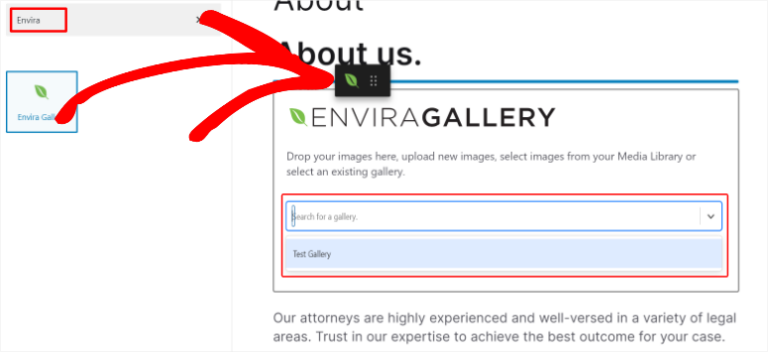
Then use the dropdown menu to select the gallery you created.
When you create the WordPress gallery, if you’re adding a lot of high-resolution images, this can slow down your website. You need to make sure that the images are optimized so that everything runs smoothly and fast.
We recommend optimizing images with tools like TinyPNG and using a caching plugin on your site.
Alternative Image Gallery Plugins
If you’re looking alternative to Envira, these are most popular plugins we recommend:
NextGEN Gallery is one of the most widely used photo gallery plugins for WordPress. It offers powerful features such as album management, lightbox effects, image watermarks, and more. It’s highly customizable and suitable for beginners, photographers, artists, and other creative professionals.
Soliloquy is a responsive slider plugin that can also be used to create image galleries. It offers features like drag-and-drop slide rearrangement, image cropping, and dynamic sliders based on featured images or custom post types.

Smash Balloon offers plugins specifically tailored for integrating social media image galleries into WordPress websites. You connect your site to Instagram, Twitter, Facebook, and YouTube.
You can also fetch your business reviews from third-party sites like Yelp and Google. Then you can showcase them in a neat gallery for your users to browse.
You can create customized or filtered galleries by post type, hashtag, media type, and more. Choose from various layout options and features like lightbox popups, grid, and carousel. It’s user-friendly and so easy to set up. Once done, the plugin will automatically fetch and display new content.
FAQs on Adding an Image Gallery in WordPress
How do I add alt text to images in the gallery?
To add alt text to images in the gallery, simply click on the image in the gallery, and you’ll see options in the right menu to add alt text to images. You can also use the ‘replace’ button to access the image’s attachment page, and you can enter the alt text in the appropriate field.
What should I do for image optimization within the gallery?
Some best practices for image optimization within the gallery include using descriptive file names, compressing images to reduce file size, and optimizing image dimensions for web display. This helps improve site performance and SEO.
How can I optimize images for SEO within the gallery?
To optimize images for SEO within the gallery, consider using a plugin like AIOSEO that has a dedicated add-on for image SEO. Also, make sure to add descriptive alt text to each image. Alt text helps search engines understand what the image is about, improving your site’s SEO.
How do I create an image gallery in WordPress?
- In WordPress, navigate to the post or page where you want to add the gallery.
- Add a new block and search for ‘Gallery’.
- Now insert gallery block.
- Choose to upload images or select media files from your library.
- Hit the ‘Create a new gallery’ button to insert gallery.
Can I crop images directly within the gallery feature
No, you cannot crop images directly within the gallery feature in WordPress. However, you can crop images in the attachment page of each image. We recommend using image editing software such as Adobe, Affinity, or Canva to crop images before uploading them to your WordPress site.
That’s all we have. If you’re interested in learning more about WordPress through easy video tutorials, then check out our course:
Worried about commitment? With our 14-day no-risk money-back guarantee, you have nothing to lose and everything to gain.
We hope you found this tutorial helpful. You may also want to see our other guides:
- How to Add a Popup Form in WordPress (Step by Step Tutorial)
- How to Create a Successful Contest in WordPress (5 Easy Steps)
- How to Backup Your WordPress Site (The Right Way!)
These free WordPress tutorials will help you make your site more interactive and gain more leads and sales. The last one teaches you how to backup your site so you never lose your progress or data.
Leave a Reply