Do you want to learn how to backup your WordPress site the right way?
There are many ways you can make a backup copy of your site, but if not done right, you can end up with a file that’s corrupt and doesn’t work!
To restore your website, the backup file needs to work. Plus, the process needs to be smooth and easy.
In this guide, we’ll show you how the best way to back up your site without any coding or technical work.
You just have to click a few buttons and your backup will be created for you and stored safely. Plus, it will be as easy as clicking a few buttons again to restore your site.
Let’s get started.
How to Choose the Right Backup Solution
You can backup your website in multiple ways:
First, you can copy your files and database manually. While this method is free, we don’t recommend it at all. It involves a complicated process of going into your website’s backend and copying the files. A small mistake can cause big problems on your site, even crashing your whole website.
Second, you can let your WordPress hosting provider take care of that for you. This solution works most of the time, however, you need to keep one thing in mind. Most web hosts store your backup files on the same server as your website. If your server crashes and there’s a loss of data, you’ll lose your website and your backup. That’s why we recommend making your own backups so you have full control.
So the best way to back up your site would be to use a WordPress backup plugin. All you have to do is choose a reliable plugin and there are plenty of free ones too!
These plugins handle all the technical work for you. So, there’s no chance of human error that makes your site malfunction.
Our top picks for backup plugins are Duplicator and UpdraftPlus. Both plugins are easy to use, and come with simple backup and restore processes.
If you’re using a WooCommerce site, then we recommend UpdraftPlus as they offer real-time backups. This will ensure every order placed is copied instantly.
For this tutorial, we’re going to show you how to back up your site using Duplicator. They have a fantastic free plan that lets anyone back up their website without spending a dime. Their pro plan comes at affordable pricing and comes with powerful features like scheduled backups, migration wizard, and 1-click restore.
Here are the key reasons why we picked Duplicator:
- Intuitive and user-friendly interface
- Full backups of your WordPress site, including all your files, themes, plugins, and databases
- Easy migration to a new hosting provider or domain with just a few clicks
- Scheduled automated regular backups
- Straightforward and quick restore process
- Zero downtime
- Supports cloud storage like Google Drive, Dropbox, Amazon S3, and more
- Free and premium versions are available
Now that you know what Duplicator is all about, let’s back up your WordPress website.
How to Back Up Your WordPress Website
We’re gonna show you how to back up and restore your site in just 5 simple steps.
Step 1: Install a WordPress Backup Plugin
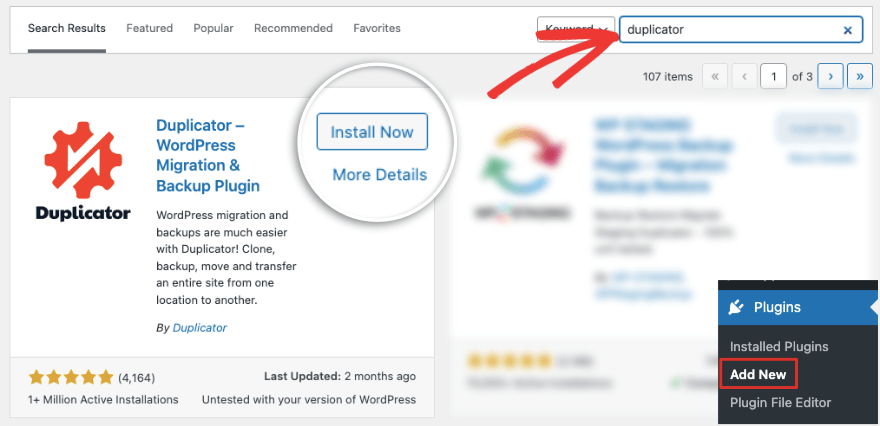
First, head over to your WordPress admin dashboard. Go to the Plugins » Add New page. Here, search for “Duplicator” and install and activate the plugin on your site. This is the free version of the backup plugin.
If you’re looking for advanced features, go to the Duplicator website. Choose a plan that matches your needs and budget. Then you’ll get a plugin file to download. You’ll also see a license key on the same page. Copy this key and open your WordPress dashboard.
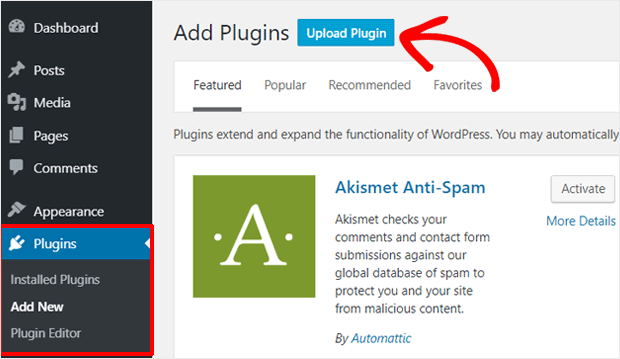
Go to the Plugins » Add New page and use the Upload Plugin button. This will take you to a page where you can upload the plugin file.
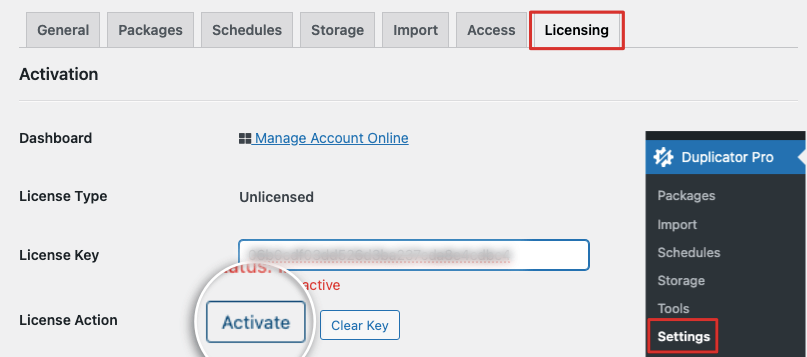
Once you activate the plugin, Duplicator will give you an option to paste your license key to connect to your pro plan. You can also access this option under the Duplicator Pro » Settings page.
Now you’re ready to start backing up your WordPress website.
Step 2: Create a Backup
In your WordPress admin panel, open the Duplicator » Packages page. You’ll see a button to “Create New” package.
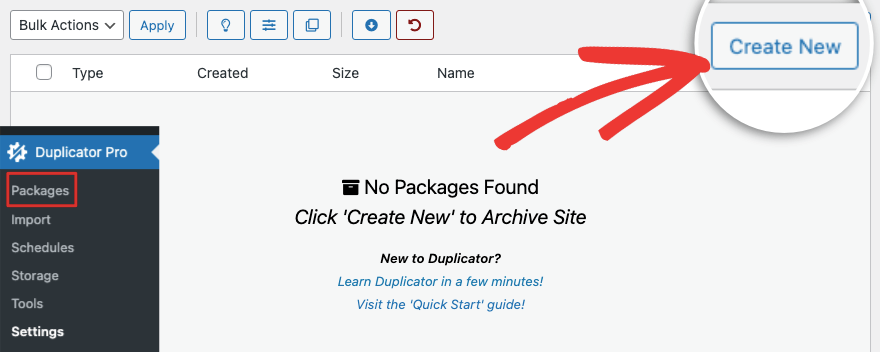
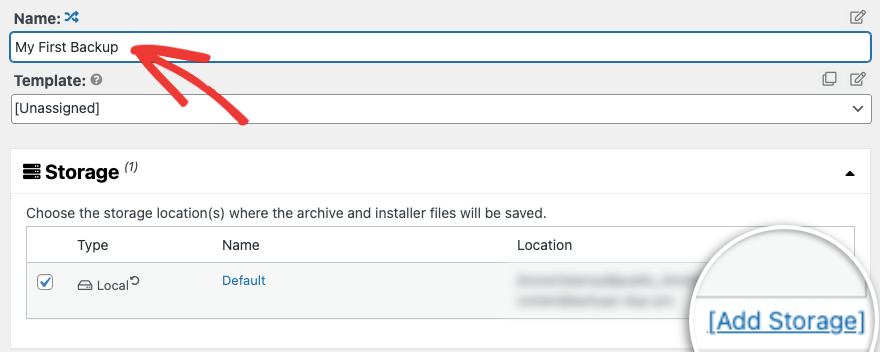
By clicking on it, you’ll be taken to a backup settings page where you can configure your backup. Here, you can add a name for your backup file and select the storage option you want.
Below this, you can choose what you want your backup file to include. You can choose to backup everything, WordPress database only, media only.
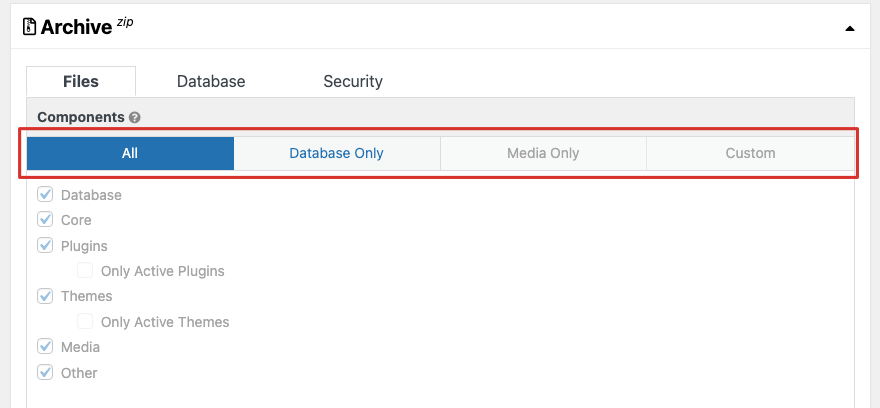
You can also create a custom package of specific WordPress files, core, plugins, themes, media, and so on.
When you head to the next step, Duplicator will scan your site to check for any issues that can cause errors in your backup file. It will display a results page like this:
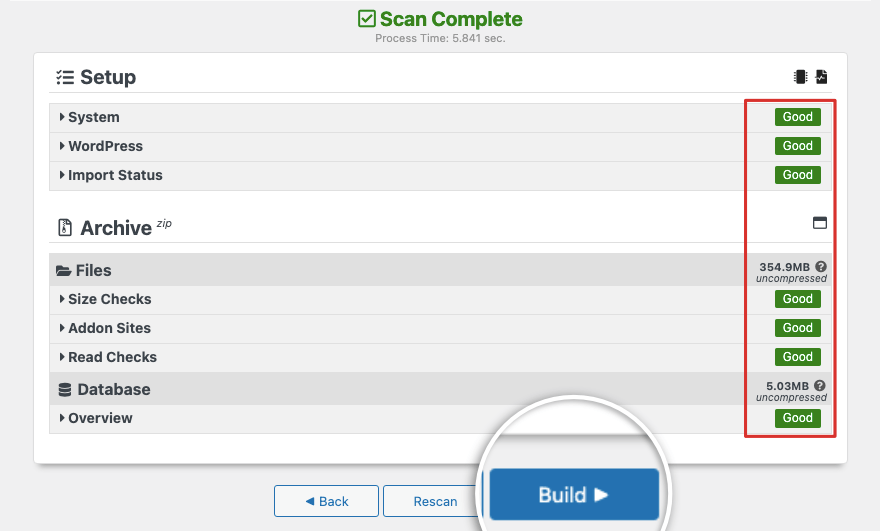
On the right-hand side, you can check if everything is marked “Good”. If there are any issues, it will show you that it needs to be resolved.
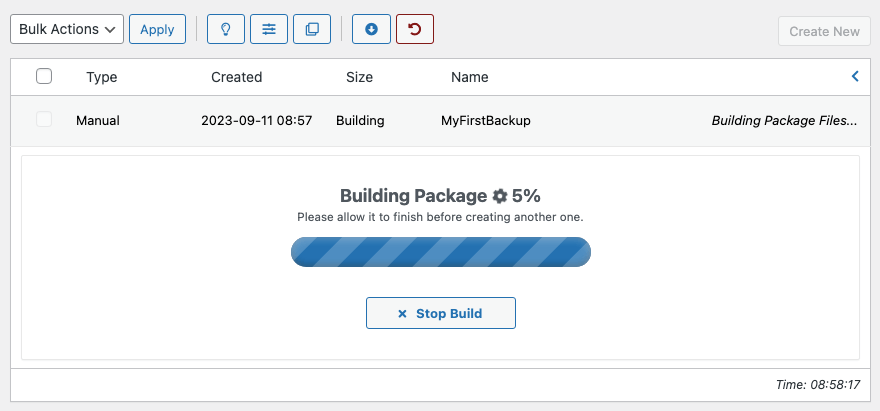
Hit the “Build” button to start backing up your website. You’ll see a progress bar showing you how much is complete. This process usually takes just a few minutes to complete, but the actual time taken depends on the size of your website. Duplicator supports large sites and has worked for sites even up to 200GB!
Once done, Duplicator will take you back to the main Packages page where you’ll see your backup copy listed.
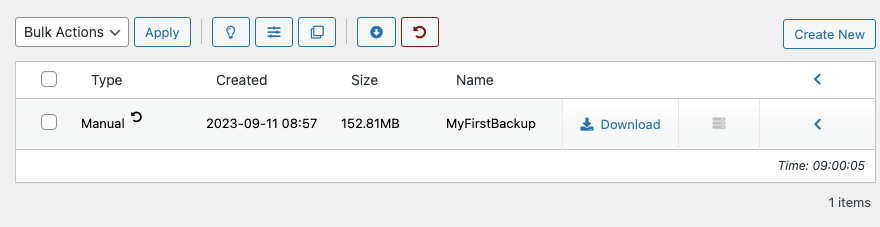
You can download your backup file to your local computer or hard drive. This is also where you can delete any backup copy you don’t need anymore.
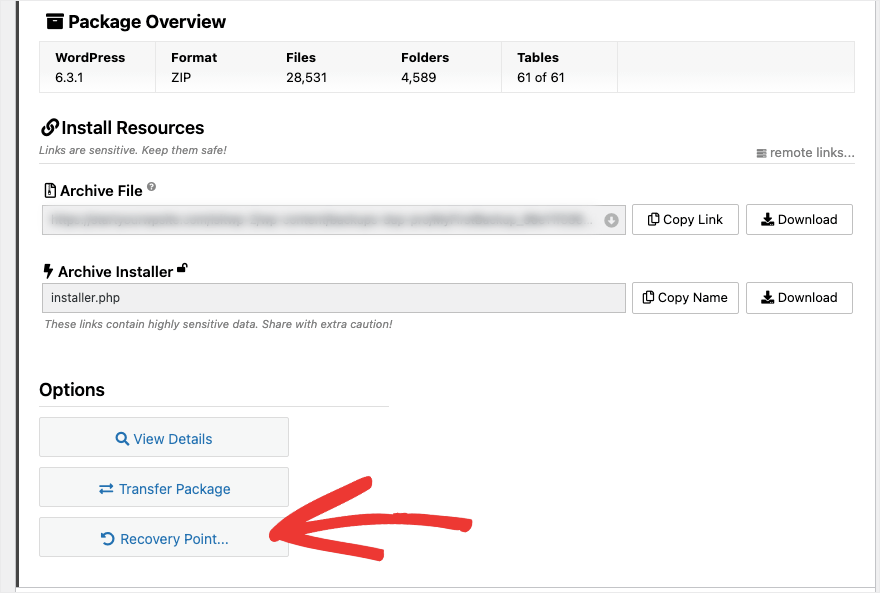
If you click on the left-facing arrow at the right of the page, you’ll get all the details of your backup. You can view details, transfer package, or set it as a recovery point.
That’s it! You’ve backed up your WordPress site. You can use this method to create on-demand backups of your entire website at any time you need.
Next, we’ll show you how to set up a schedule for your backups to run automatically.
Step 3: Set Up Scheduled Backups
If you make changes to your website on a regular basis, you may find it much easier to have the backups run automatically.
Duplicator Pro lets you create a schedule so that changes on your site are backed up without you manually creating a new backup.
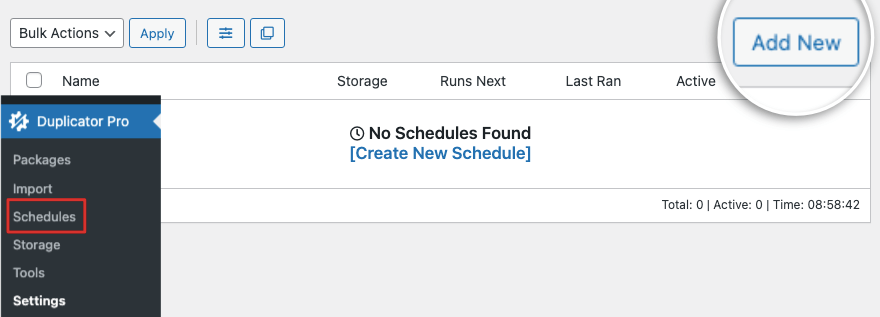
We’re going to show you how to set that up in under a minute. Navigate to Duplicator Pro » Schedules tab. Simply click the Add New button here.
Now you’ll be on a page with the schedule settings. You can add a name and choose where the backups will be stored.
Below that, you can set the time period for Duplicator to automatically take backups. You can choose from hourly, daily, weekly, and monthly schedules.
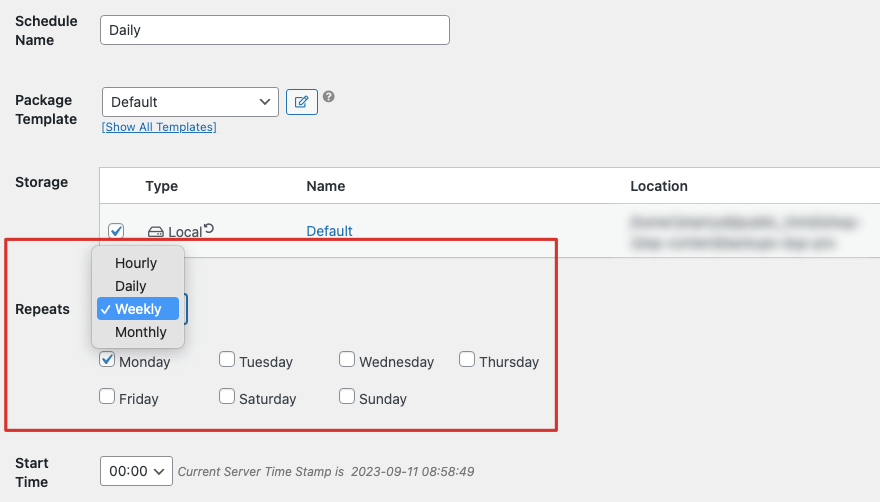
If you make changes to your site every day, we suggest daily backups.
You can even pick which day of the week and the exact time you want the backup to run. So for instance, if you want to back up all the changes made by your team at the end of the week, then you can schedule it to run on Friday at 9:00 p.m.
Make sure you enable the schedule and save your changes and that’s all there is to it!
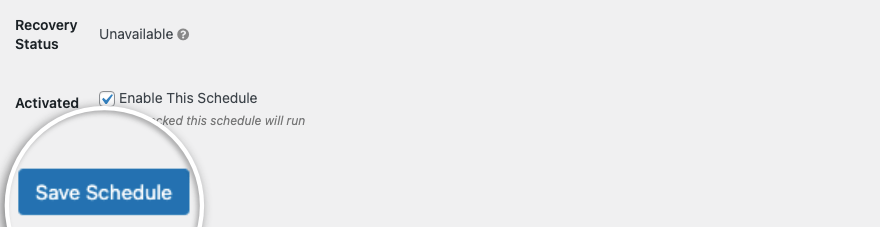
Duplicator will now automatically back up your website according to your set schedule.
Now coming to the most important part about having a backup of your site – restoring it! Backing up your website is just the first part of securing your website’s data.
When things go wrong, you should be prepared to quickly restore it instead of trying to figure out the restore process in the midst of the incident.
This is one of the main reasons why we picked Duplicator for this tutorial. The restore process is easy and straightforward.
Step 4: Restore Your WordPress Site
The process below isn’t exactly a one-click process, there are about 3 steps involved and we feel this is necessary.
Restoring your site with a backup copy is not a process you should take lightly. So it’s best that there are certain safety measures in place to prevent you from restoring your site to an old version by mistake.
Let’s quickly learn how to restore the backup file you just created so that when the time comes, you know exactly how to do it without any stress.
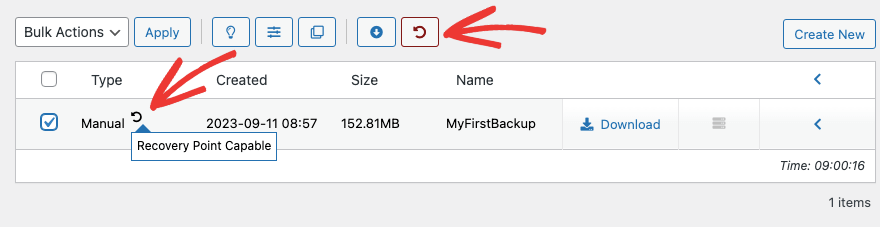
On the Duplicator » Packages tab, you’ll see the backup that you created. Find the Restore icon in the top menu that’s a circular arrow and click on it to start the process.
We also want to add that you’ll see the same Restore icon next to your backup under the Type column. This button lets you set this backup as the default recovery point.
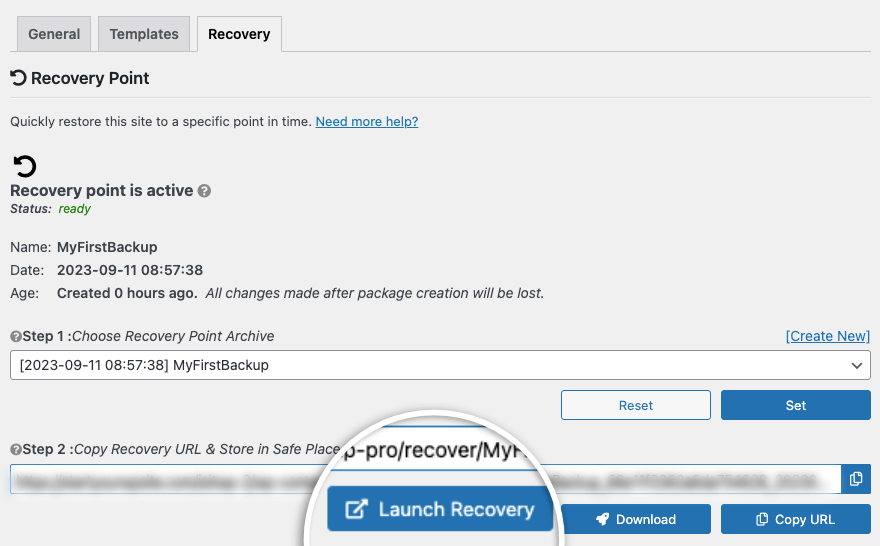
Coming back to the restore process, when you click on the top Restore icon, Duplicator will take you to the Recovery page.
Here you can choose the backup copy you want to restore and hit the Launch Recovery button.
If you have not already set a recovery point, Duplicator will display a popup:
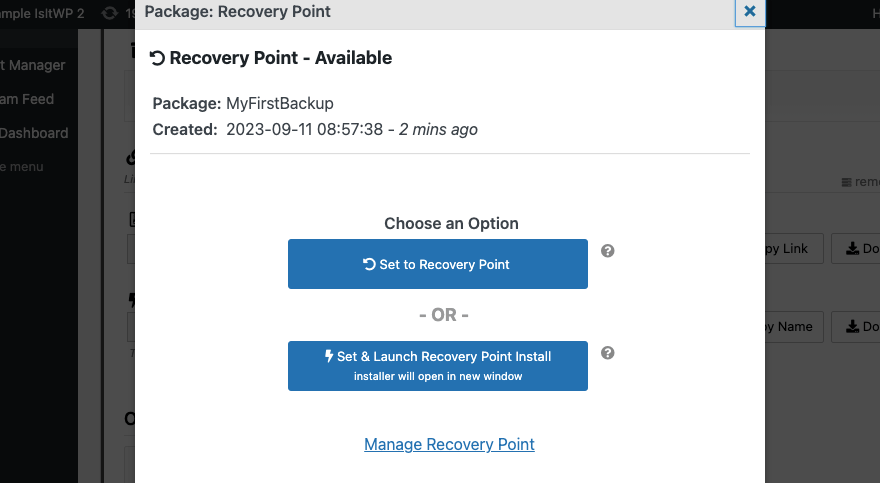
Here, you’ll need to choose the second option: Set & Launch Recovery Point Install.
Next, you’ll see the details of your recovery point. Here, Duplicator warns that this restore process will clear site data and replace it with the current package. This process cannot be undone so be sure that you want to restore your site.

Now all that’s left to do is agree to the terms and conditions and click on the Restore Recovery Point button.

Duplicator will double check with you once again if you’re sure and you can click on the OK button.
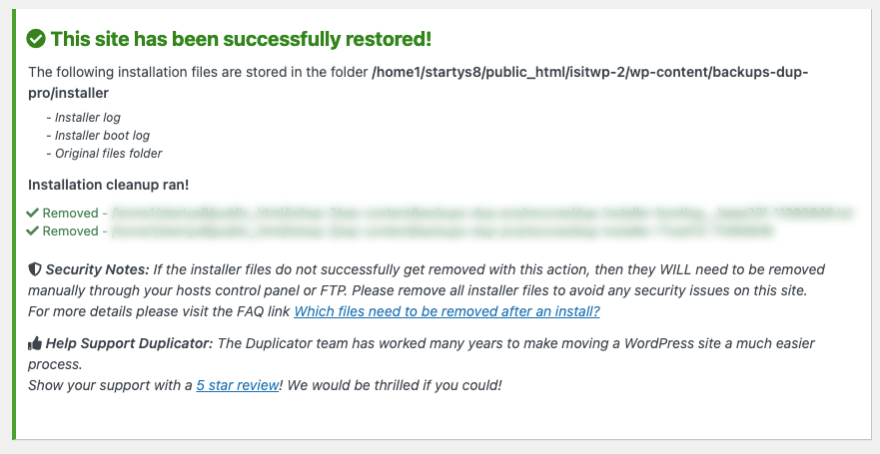
The recovery process will run and once it’s done, you’ll have an option to log into your WordPress admin.
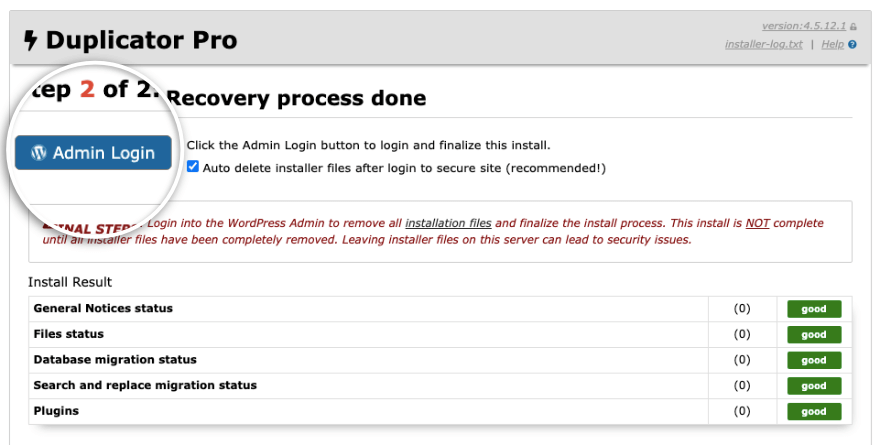
Once you log in, you’ll see a success page like this:
That’s it! You’ve learned how to restore your site when you need to. We suggest bookmarking this tutorial so that you can come back to these steps when you need them.
You can also consult the Duplicator documentation for steps on how to back up and restore your site.
In case you want to do a manual backup of your site, we show you the steps below, however, if you are not familiar with the WordPress backend, we do not recommend this method at all.
How to Manually Backup WordPress
To back up WordPress files, you need to connect to your WordPress website server using an FTP client like FileZilla. Enter your FTP or SFTP credentials to establish a connection.
Then you can locate your WordPress files. This is usually in the public_html folder. Copy and download all your WordPress site folder to your computer.
Alternatively, you can access your WordPress files through cPanel in your hosting account. Open File Manager and find your website folder inside the public_html folder. Then you can simply right-click, compress it, and then download the zip file.
Now this backup isn’t your entire site. This is just your core files and other website files, it doesn’t include your dataase.
To create backups of your WordPress database, you need to log into phpMyAdmin. There, you can select your mySQL database and download it to your computer.
That’s it. You now have a manual backup of your website.
If you suspect your site has been hacked and you want to restore it, we suggest also cleaning up the malware to keep hackers out. You can use a security solution like Sucuri to help you with this.
We hope you found this step-by-step tutorial helpful. Next, you’ll want to see our other guides on:
- Best Form Builder Plugins for WordPress
- Best WordPress Page Builders Reviewed
- Best WordPress SEO Plugins and Tools
These guides reveal the best tools to create stunning pages and forms for your site. We also added a guide to help you boost your site’s SEO to drive more traffic and rank better on Google.