Do you want to add CAPTCHA to your WordPress site to stop spam?
Spammers use automated scripts to flood your site with spam comments, registrations, or other form submissions. CAPTCHA can help prevent this by testing whether the user is a human or a bot.
In this step-by-step tutorial, we’ll show you how to add CAPTCHA to your site easily. We’ve taken care to avoid coding and any jargon and make this as beginner-friendly as we can. First, let’s look at what CAPTCHA is and what you’ll need for this tutorial.
What is CAPTCHA?
Before a user can submit a form or comment, CAPTCHA presents a challenge to them to prove they are human.
This is typically in the form of distorted text, images, or puzzles, that are easy for a human to solve but difficult for automated spam bots. The user needs to give the correct response to the challenge to prove they are human.
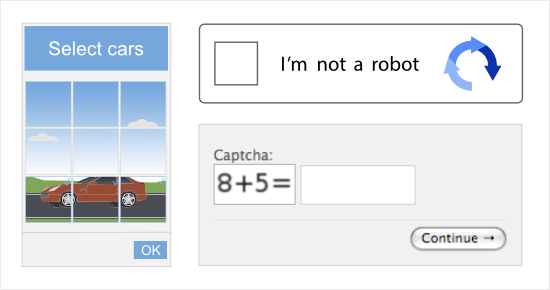
It acts as an additional layer of security to your login page, forms, and comment forms.
This is especially important for membership and WooCommerce sites where customers need to log into their account. Hackers typically use a method called brute force attacks where an automated bot will attempt thousands of combinations of usernames and passwords to guess the login details of accounts.
With CAPTCHA protection, bots won’t be able to carry out such attacks. So it helps keep the customer’s data safe and their accounts protected from hackers.
Now, there are a few ways that you can add CAPTCHA protection to your site. However, some of them are really complex. We want to make this as simple as possible for you.
The easiest and free way to build spam-protected forms in WordPress is using WPForms.
WPForms is the best WordPress form builder plugin that makes it easy to create any form you need for your website.
Every form you create comes with built-in spam protection. Plus, it’s relatively easy to add CAPTCHA to your forms by clicking a few buttons.
WPForms supports Google reCAPTCHA and all 3 versions provided under it:
- v2 Checkbox reCAPTCHA: Prompts users to check a box to prove they’re human.
- v2 Invisible reCAPTCHA: Uses advanced technology to detect human users without requiring any input.
- v3 reCAPTCHA: Uses a behind-the-scenes scoring system to detect abusive traffic, and lets you decide the minimum passing score. Recommended for advanced use only (or if using Google AMP).
You can also connect your site to hCAPTCHA and CloudflareTurnstile.
Aside from this, WPForms comes with 1300+ templates to publish forms on your site in minutes. Plus, you get a drag and drop visual builder to customize the forms to your needs.
Now WPForms comes in both a free and pro version. In the free version, you can connect to Stripe for payments and Constant Contact for emails.
The pro version gives you access to powerful features like:
- Smart conditional logic
- Field validation
- Multi-page forms
- Form entry management
- Instant form notifications
- Payment platforms like PayPal, Authorize.net and Square
- Email integrations with Drip, AWeber, Brevo, and more
It also comes with tons of addons so you can enable features as you need such as conversational forms, geolocation, surveys and polls, file uploads, form abandonment, and form locker.
Get started with WPForms here »
Follow along with video tutorials here »
Now that we’re clear on why we’ve chosen WPForms to add CAPTCHA, let’s head straight to the tutorial.
How to Add CAPTCHA to a WordPress Form?
Step 1: Get Google reCAPTCHA Keys
For this tutorial, we’re going to show you how to add the free Google reCAPTCHA to your site. First thing you’ll need is your reCAPTCHA API keys.
To create these keys, you need to head to the reCAPTCHA website and click on ‘v3 Admin Console’.

You may have to sign into your Google account if you aren’t already logged in on your browser.
Now a new page will open where you’ll see a form field to add a label for the reCAPTCHA you’re creating. Below that, you can select the version of reCAPTCHA you want to add to your site.
You can choose between these options:
-
- Score based
- Challenge
- ‘I’m not a robot’ checkbox
- Invisible reCAPTCHA badge
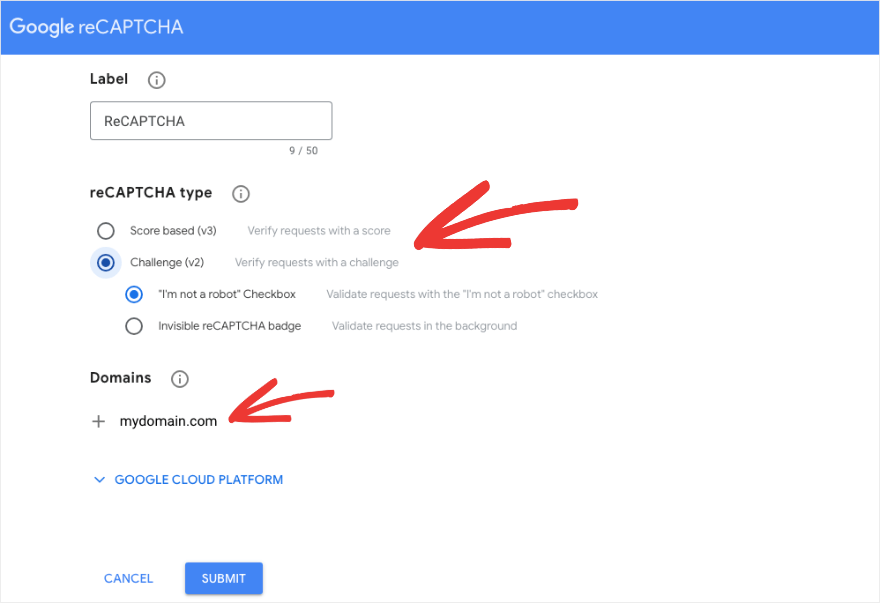
Once you’ve chosen the one you want, you need to add your domain name and hit the ‘Submit’ button.
You should see a success page along with your site key and secret key that Google has generated for you.
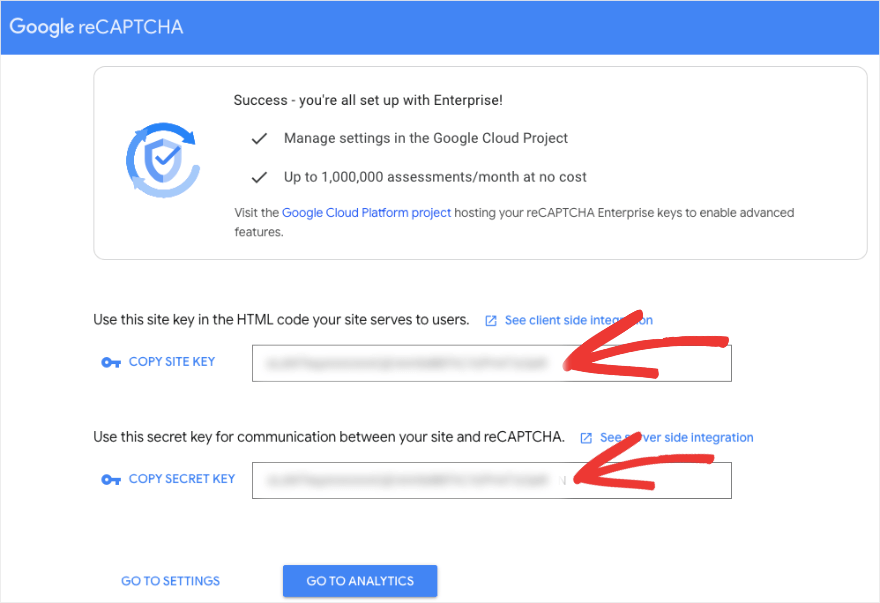
Copy these keys and keep them ready for later. Now let’s get WPForms installed on your site.
Step 2: Add WPForms to Your Site
To connect your website to the Google reCAPTCHA you created, we’ll use WPForms.
First, you need to install and activate WPForms on your site. In your WordPress admin, head over to the Plugins » Add New page. Search for ‘WPForms’ and click on the ‘Install Now’ button. Then activate the plugin.
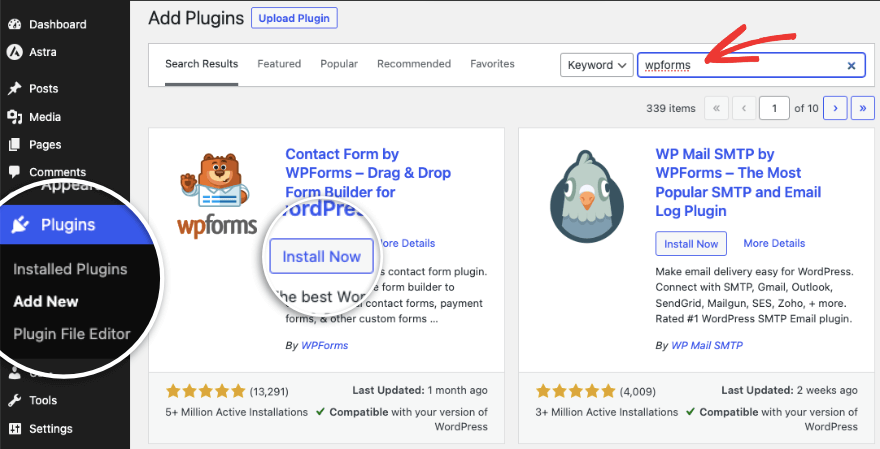
This gets you the free version of WPForms. If you want the pro version, head to the WPForms website and sign up for a plan. Then you’ll get access to your own account where you can download the WPForms pro plugin. You’ll also get a license key that you should copy.
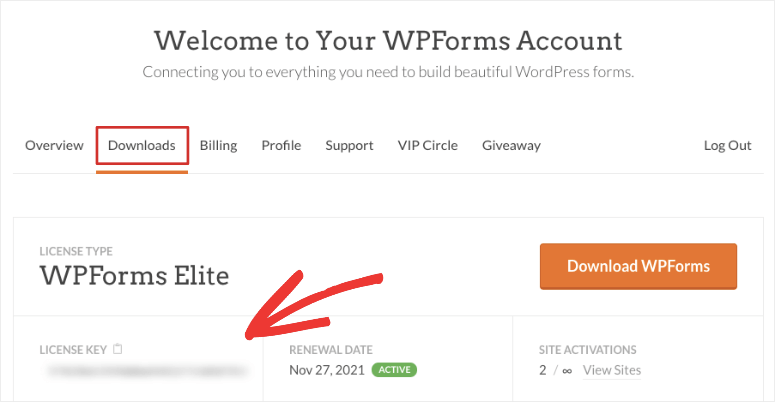
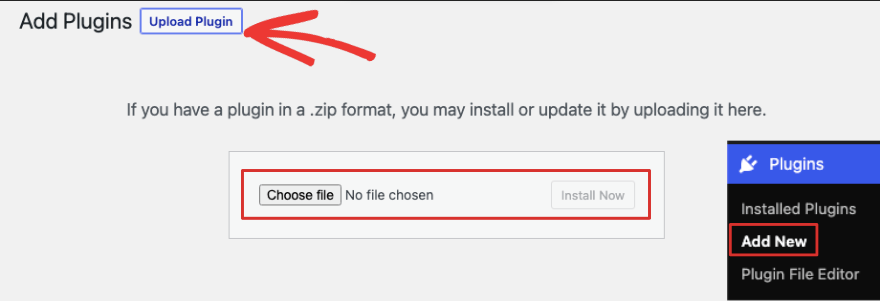
Simply upload the plugin file under the Plugins » Add New » Upload Plugin page.
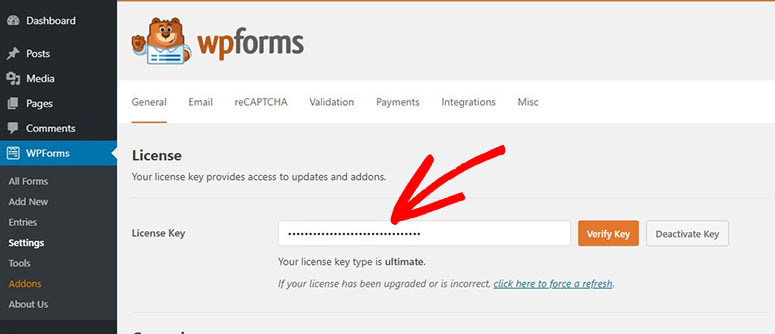
Once WPForms is activated, you can add your license key under the plugin Settings page. Verify the key and your license will be active.
You can start building your forms now but first, we’ll quickly connect Google reCAPTCHA to WPForms.
Step 3: Connect WPForms and reCAPTCHA
In the Settings page of WPForms, switch to the CAPTCHA tab.
You’ll see options to set up hCaptcha, reCAPTCHA, Turnstile, or turn it off.
We’ll choose reCAPTCHA.
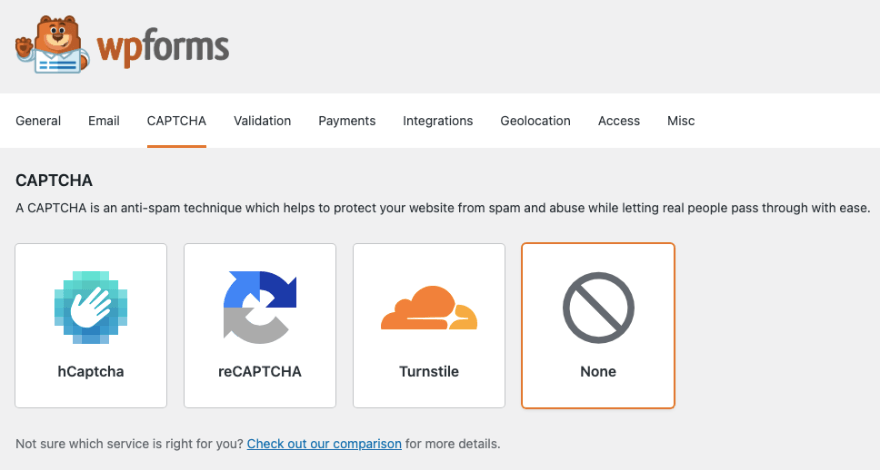
Now you can choose what type of CAPTCHA you want to use. The checkbox requires the user to check a box that proves they are human.
However, if you don’t want to disturb the user experience on your site, then opt for Invisible reCAPTCHA. This checks if the user is human without requiring anything done from their end.
Keep in mind that CAPTCHA does not directly impact SEO (search engine optimization), especially on login pages, comment sections, and forms. However, hiding content behind captchas could affect user experience and thus affect SEO.
After you choose the type of CAPTCHA you want, below that, you can paste the site key and secret key you created earlier.
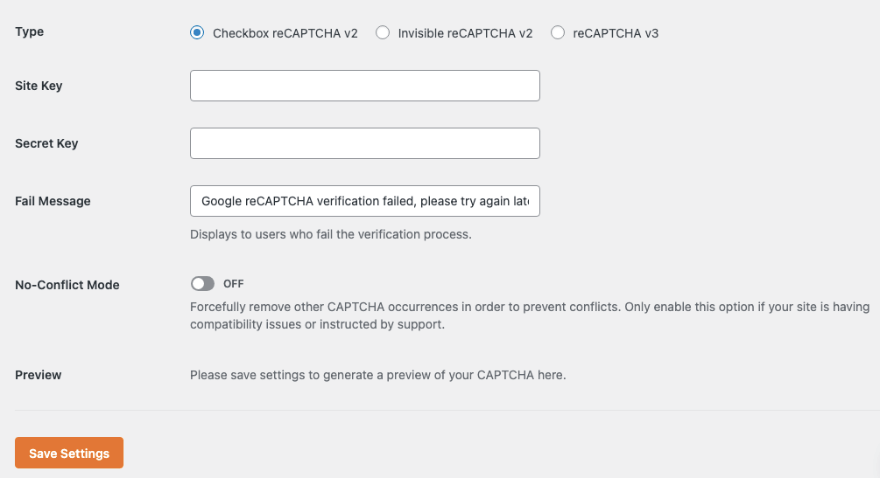
That’s it. Save Settings and let’s move on to adding it to your website forms.
Step 4: Create a CAPTCHA-Enabled Form
WPForms is popularly known as the best and most user-friendly contact form plugin, however, it lets you create any kind of form you need for your site including contact form, registration form, login form, password form, event signup, newsletter optin, purchase forms, and more.
In your WordPress dashboard, go to WPForms » Add New to create a new form. You can also edit an existing form if you already have one.
You’ll see a library of templates. First, let’s add a name for the form at the top. Then you can use the search bar to filter form templates and find what you need faster.
We’ll choose the Simple Contact Form template.
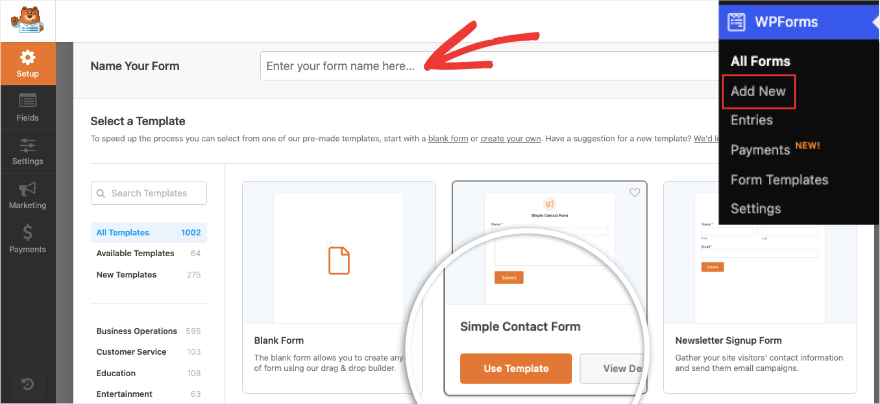
When you select a template, the drag-and-drop builder will open. You’ll see a preview of your form on the right and editing options on the left.
This lets you edit your form visually as it would appear when it’s live on your site.
To add new fields, simply select the one you want on the left and drag and drop it into your form preview.
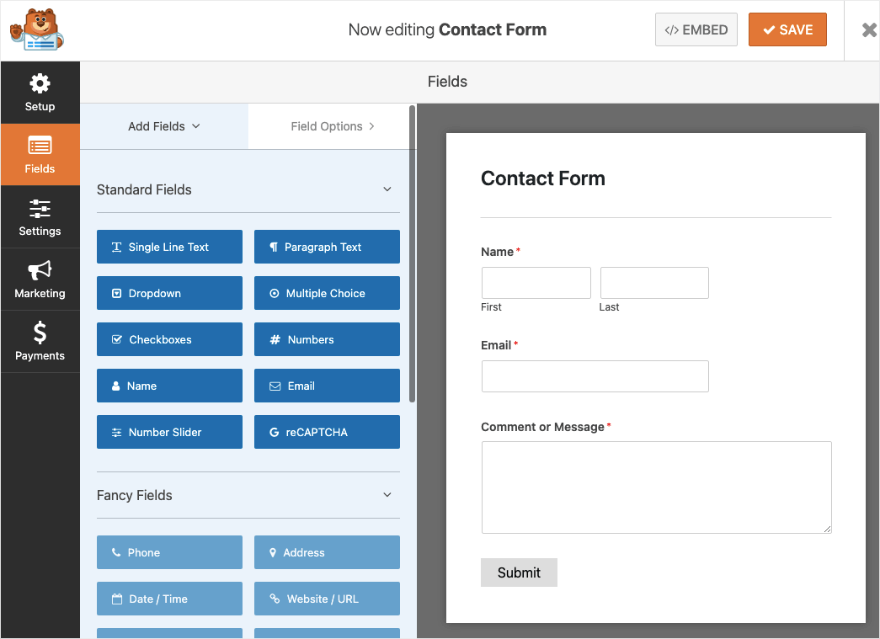
In the free version, you can add fields like single line, paragraph, dropdown, multiple choice, name, email, and more. You also get the Google reCAPTCHA field.
The pro version gives you access to advanced fields like phone, date/time, file uploads, password, Likert scale, signature, and custom captcha.
Now let’s enable reCAPTCHA on this form by clicking on the reCAPTCHA form field under the Standard Fields section.
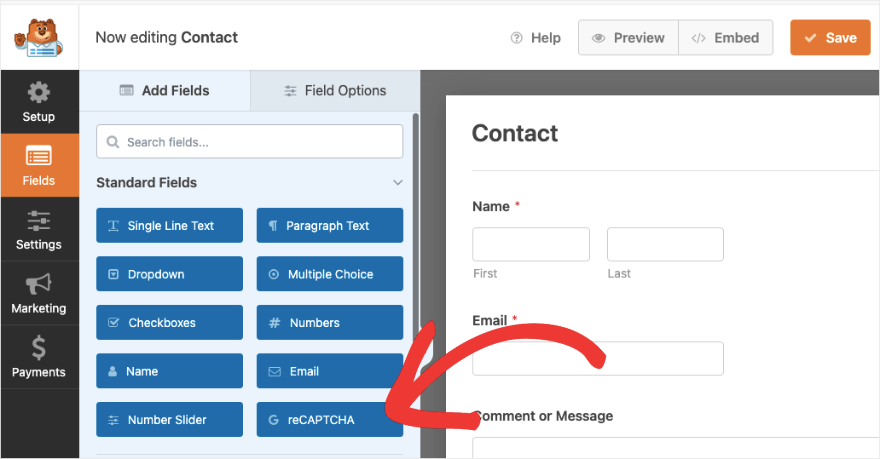
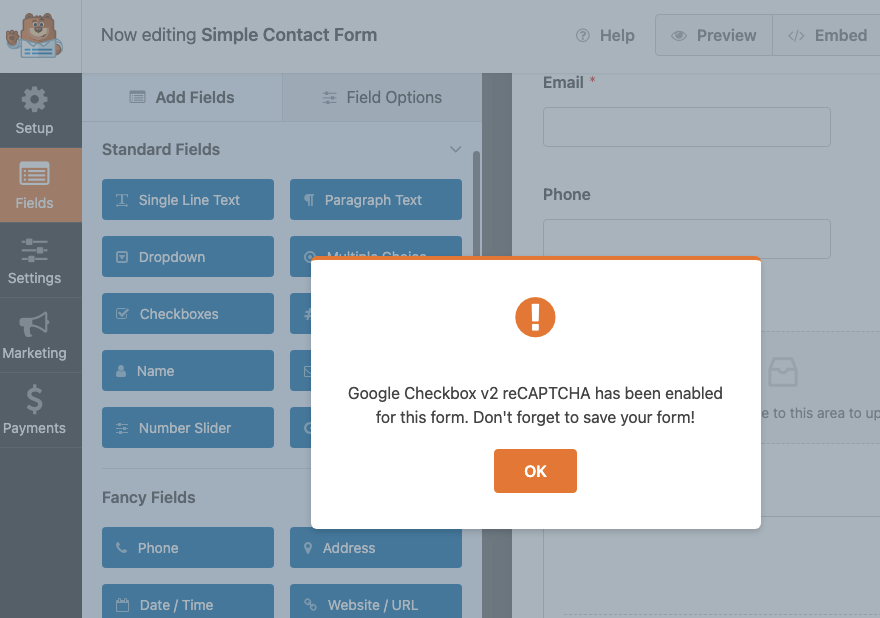
When you click on it, you’ll see a message appear that says ‘Google Checkbox V2 reCAPTCHA has been enabled for this form. Don’t forget to save your form!’
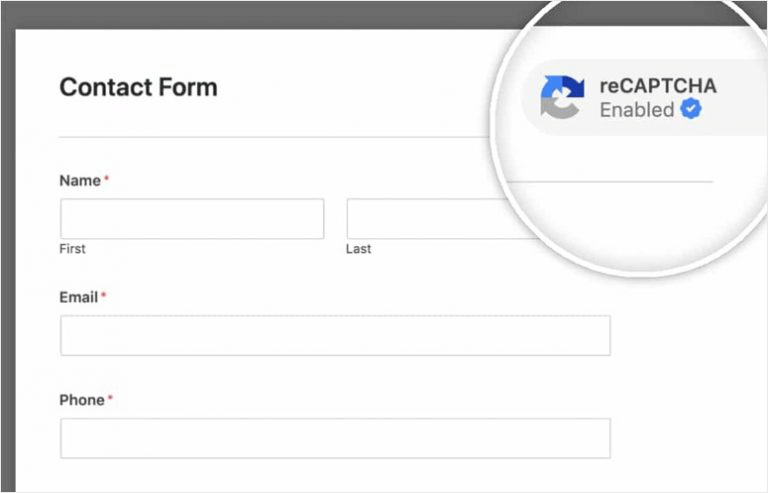
You’ll also see the form preview has a reCAPTCHA enabled badge on it.
There’s nothing more you need to do here. Save changes by clicking the ‘Save’ button at the top-right corner of the screen. Now it’s time to add the form to your website and WPForms makes this process real easy.
Step 5: Publish the CAPTCHA Form on Your Site
You can add your CAPTCHA-enabled form to any page, post, or widget-ready area such as a sidebar or footer.
Let’s add it to a new post in WordPress. Open a new post using the block editor. Add a new block and search for ‘WPForms’. You’ll see that there’s a dedicated block available.
This will add a WPForms section to your page where you can choose the form you created from a dropdown menu.
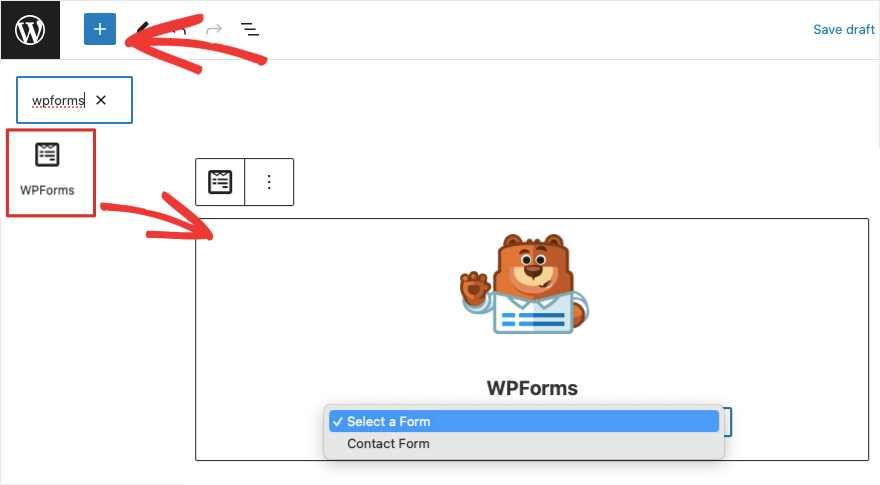
When you select the form, a form preview will appear on the post-edit screen.
Once you’ve saved or published the page, you’ll see a form on your site with the CAPTCHA checkbox before the ‘Submit’ button.
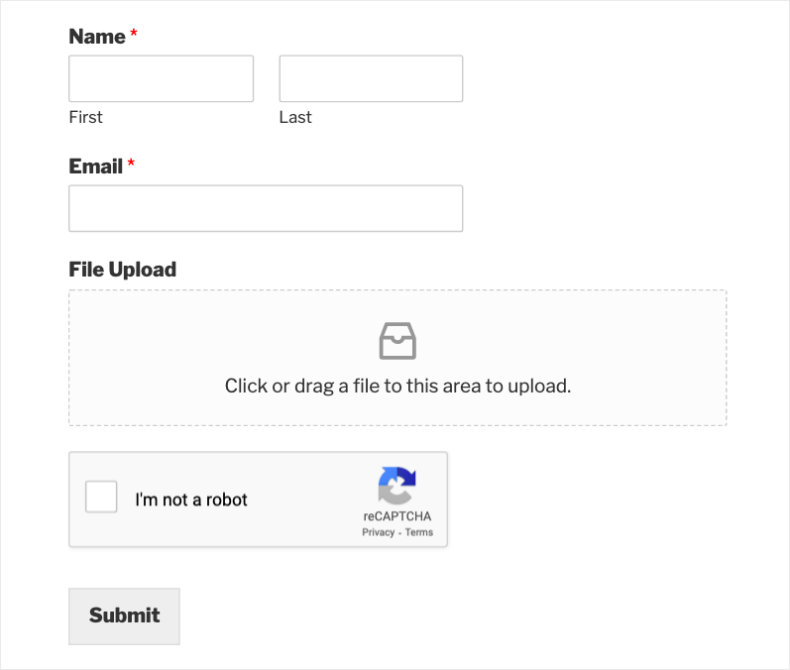
That’s it! You’ve successfully added CAPTCHA to your WordPress website.
We hope you found this tutorial helpful. If you’re looking for a dedicated CAPTCHA solution, check out our review of the Best WordPress CAPTCHA Plugins. We discuss in detail WordPress plugins like CAPTCHA 4WP, Really Simple Captcha, and Login No Captcha reCAPTCHA plugin.
To control spam in the comments section, we recommend checking out our full WordPress101 Course where you’ll learn how to manage comments and discussions.
Now, WPForms is a versatile form builder. You can continue to use WPForms to create all sorts of forms for your site. And now that you’ve already enabled the Google CAPTCHA functionality, you can use CAPTCHA on every form you build by simply clicking on 1 button inside the WPForms builder.
You can build custom WordPress login and registration forms, and even customize the submit button. Every form you build can use the same CAPTCHA protection you set up.
To make the most of this powerful form builder, check out our video tutorial course:

