
Do you want to add a contact form to your WordPress site?
Contact forms give users an easy way to connect with you about any questions or collaborations. It’s easy to add to your site and opens up opportunities to get leads and sales.
We’re going to show you how to add a contact form in just 5 easy steps. It’ll take you less than 10 minutes from start to finish, let’s go! This method will also set you up to create any kind of form you need for your site in the future as well.
What’s the Best Way to Add a Contact Form to WordPress?
The best way to add a contact form to your WordPress site is by using a plugin. These WordPress contact form plugins make it as easy as clicking a few buttons to get a stunning form on your site. You won’t need to deal with any coding and CSS to design or style your form.
Now there are quite a few WordPress form plugins to choose from. Our favorite is WPForms.

WPForms is hands down the best form builder for WordPress. It’s loved and trusted by 6+ million users across the globe.
It comes with 1000+ templates, you’ll never have to start from scratch. You’ll find a form that’s ready to be published on your site.
This means you can add a newsletter signup, event registration, login, appointment form, surveys, polls, and more.
If you need to make changes, there’s a visual drag and drop editor. This lets you edit the form as you would see it live on your site. You just have to click to edit the content and drag and drop new elements to where you want them to appear.
Apart from these essentials, WPForms comes with powerful advanced form features that include:
- Instant notifications about form submissions
- Automated email notifications to users
- Entry management
- Smart conditional logic
- Conversational forms
- Multi-page forms
- Email marketing integrations
- Payment integrations with PayPal, Stripe, and more
- Built-in spam protection
That’s just to name the highlights. There’s a lot more to this form builder and it works with all popular WordPress themes.
You can get started for free version called WPForms Lite available at WordPress.org. For advanced features, sign up for WPForms Pro.
Now let’s dive into the tutorial to get your contact form set up in a few minutes.
Step 1: Install WPForms
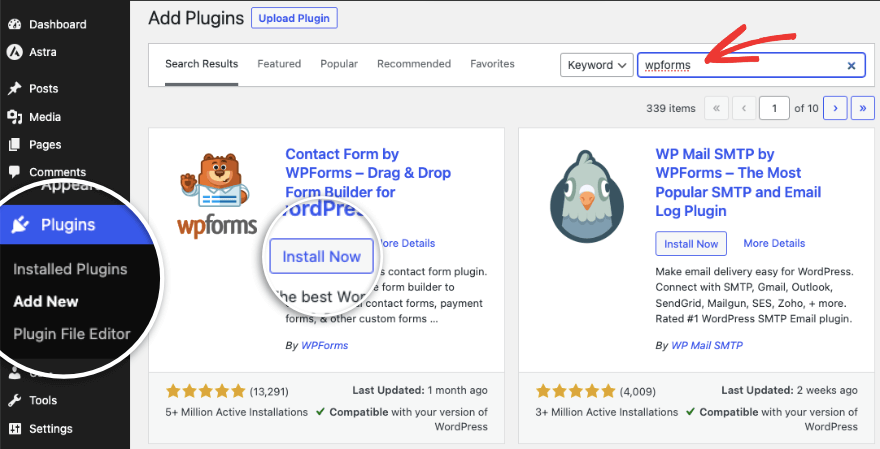
The first thing you need to do is install WPForms on your site. In your WordPress dashboard, head over to the Plugins » Add New page. Search for WPForms and you’ll see an “Install Now” button next to it.
Once you install it, you’ll need to also activate the plugin right there.
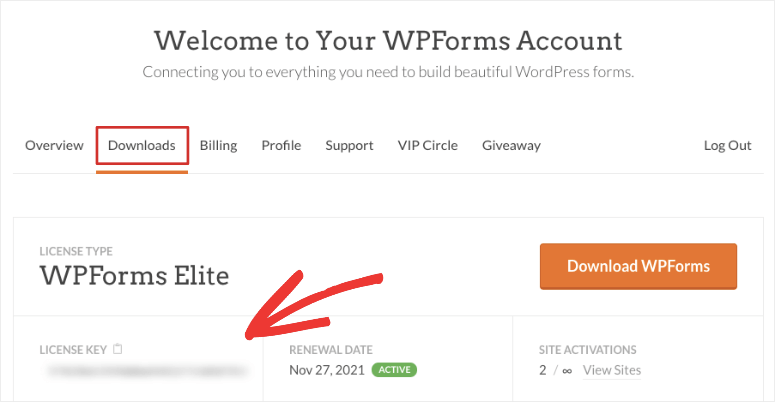
That’s it. You’re ready to use the WPForms lite version that’s free. If you want to get access to all the advanced features, then head over to the WPForms website. Subscribe to a plan of your choice and then you’ll get a plugin file to download along with a license key that you can copy.
Head over to your WordPress admin dashboard. Go to Plugins » Add New » Upload Plugin.
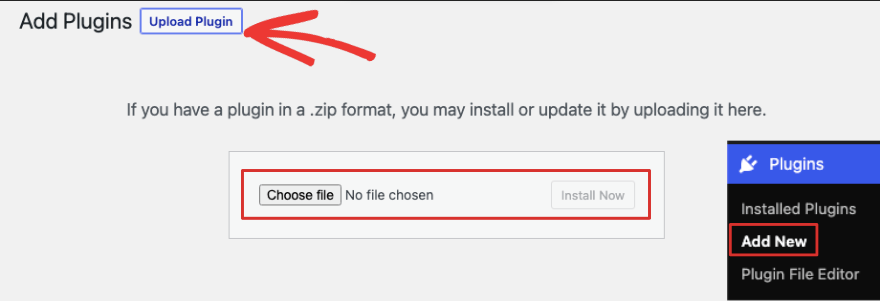
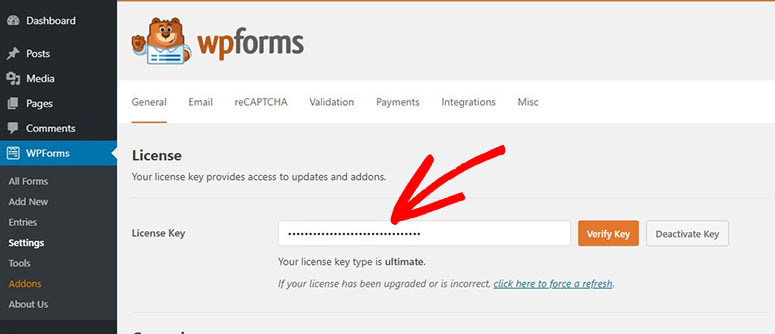
Here, you can select the WPForms plugin file you downloaded. Once installed, activate the plugin and you’ll get an option to paste the license key. You can also paste the license key under WPForms » Settings page.
Now you’re all set to create any form you need.
Step 2: Create Your First Form
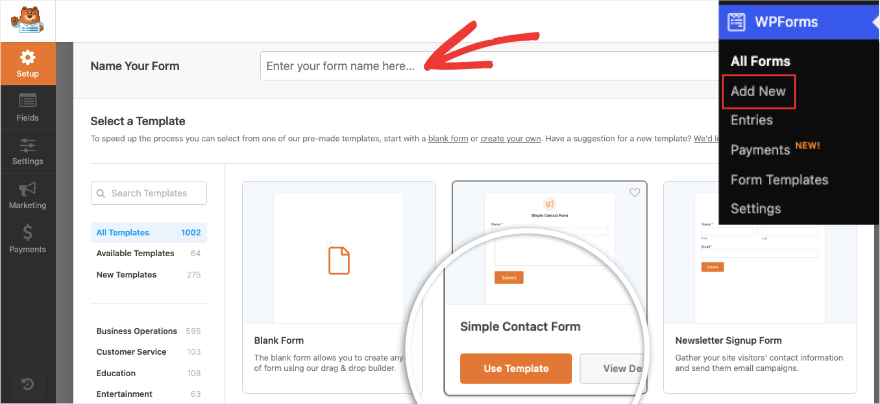
To create a contact form, go to the WPForms » Add New page. You’ll see a field to name your form. We’re naming it “Contact Form”.
Below this, you’ll see templates available. Select the Simple Contact Form template.
This will open up the visual drag and drop form builder. Everything is designed to be user-friendly and simple. You’ll see a preview of the basic contact form on the right and an editing taskbar on the left.
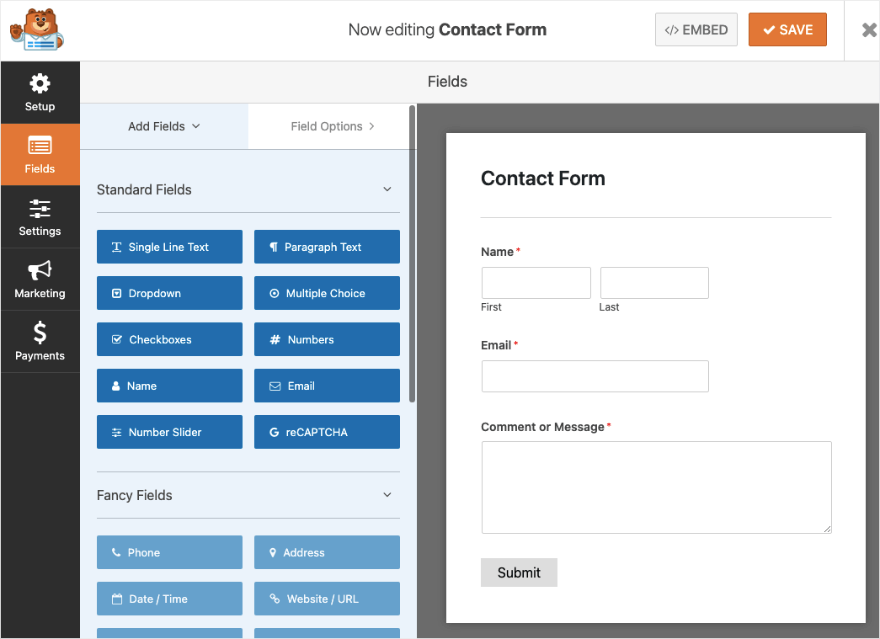
If you want to change any of the text here, you simply have to click on the text in the preview and edit it.
To add new field options, you can select any form field on the left and drag and drop it into the form preview. We added a checkboxes field and when you select it in the form, you’ll see editing options appear in the left menu like this:
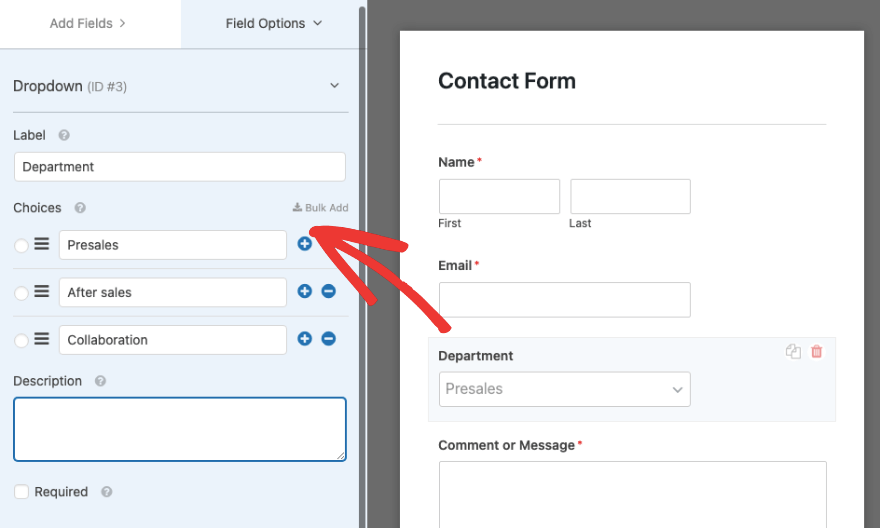
You can change the field label and add a description. You can also add and delete choices and relabel them.
At the bottom, you’ll see a checkbox named “Required”. If you enable this, then the user will have to fill out this form field before they’re allowed to submit the form.
Go ahead and play around with this builder to test out all the features it has.
We suggest adding only the required fields to your contact form, you don’t want to discourage users from filling it up by asking for too much information right at the start.
Our recommendation is to add a name field, email or phone number, and a comments section.
If you need to change the order of the fields in your form, simply click on it and drag and drop it to where you want it to appear. There are also options to quickly duplicate or delete fields.
Now that you know how to customize your WordPress contact form, make sure you save your changes and then head to the next step below.
Step 3: Set Up Forms Notifications and Confirmations
WPForms has a neat feature where you can set up automated emails to be sent to you, your team, and the person who submitted the form.
In the WPForms builder, go to the Settings tab. You’ll see the General form settings page open like this:
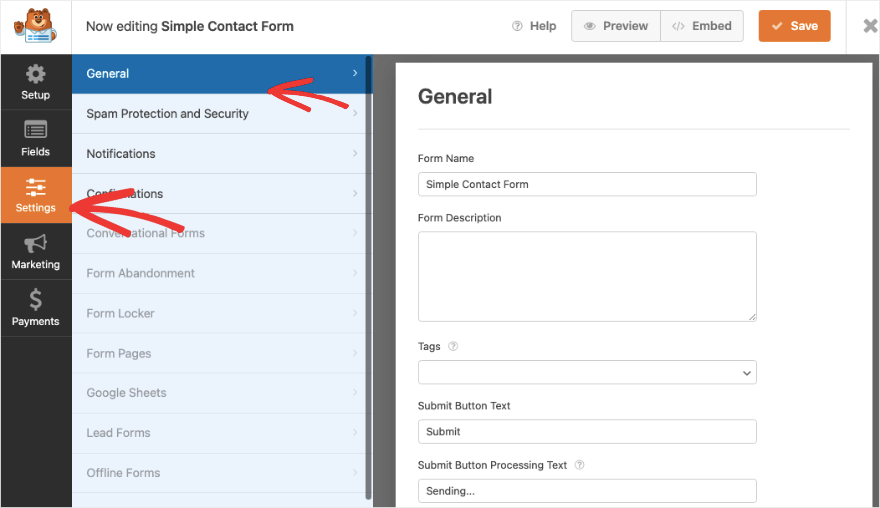
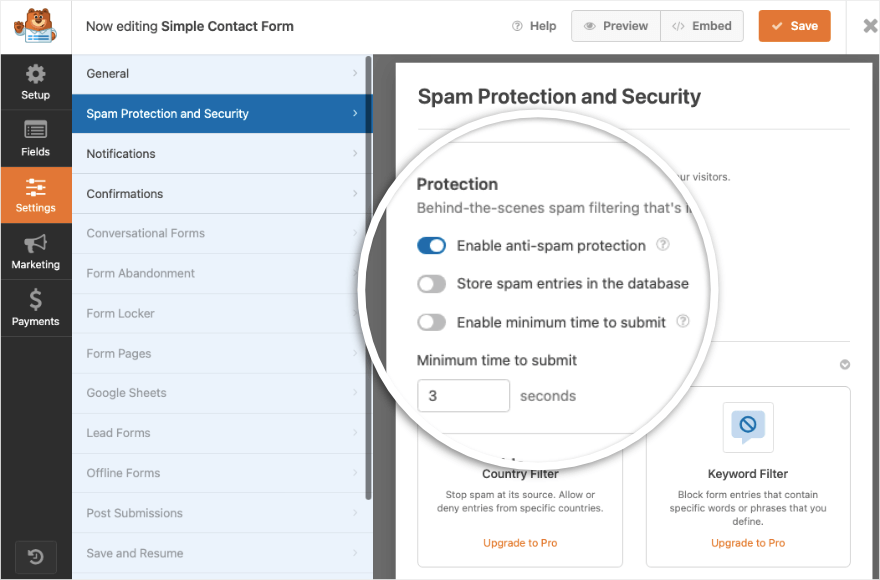
Here you can edit the form name, description, submit form button, and more. In the next tab called Spam Protection and Security, you can enable/disable spam protection and captcha. This keeps spammers out so you only get real form submissions.
Switch to the Notifications tab. A default admin notification is already set up for you. When a user submits the form, and automated email with the form details will be sent to the admin email of your WordPress website.
You can set up new notifications using the “Add New Notification” button.
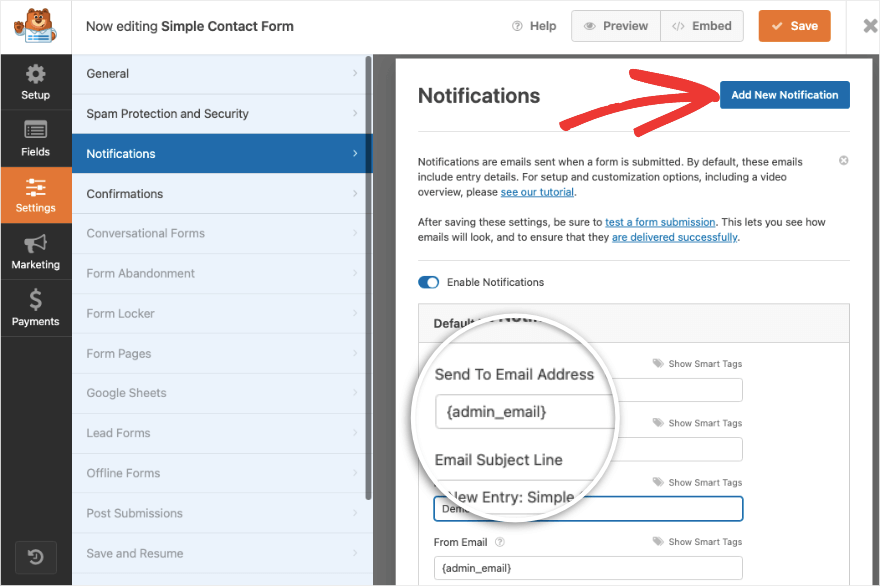
Next, you’ll see options below to customize the email address, email subject line, from name, and email message field.
This notification feature also lets you also send email confirmations to your users letting them know that you’ve received their submission and that you’ll get back to them or what to expect next.
Next, WPForms also lets you control what happens as soon as a user submits a form. You can customize this by switching to the Confirmations tab.
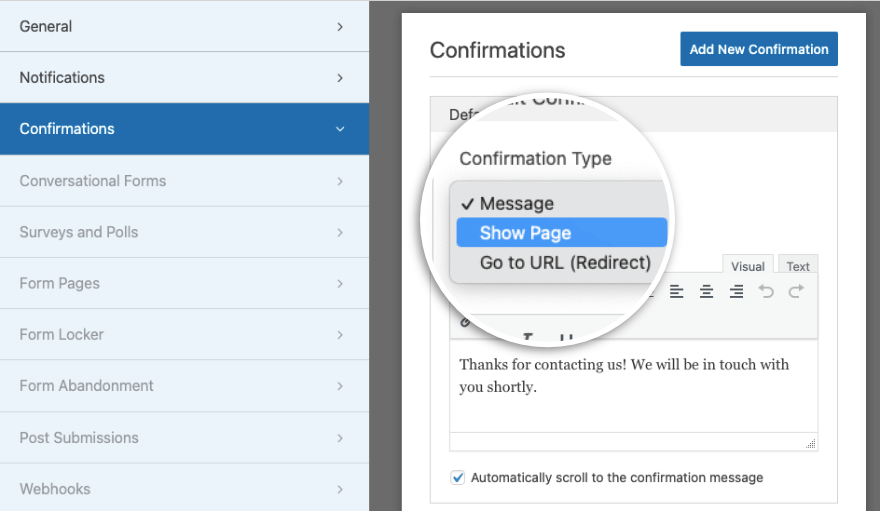
This functionality has 3 options here:
- Message: Display a custom text message on your website itself.
- Show Page: Take users to a specific page on your website
- Go to URL (Redirect): Send users to any URL including third-party links
This lets you continue the user’s journey and keep them on your site for longer even after they submit your contact form.
Make sure you hit the Save button at the top. Now you’ve got the form confirmation and notification settings right. Let’s show you how to quickly add an email integration. This will let you send new leads straight to your email list. You can then start them on welcome emails or an automated trigger campaign.
Step 4: Add an Email Integration (Optional)
If you want to send new contacts to your email marketing contact list, you can sync your new form with that email account.
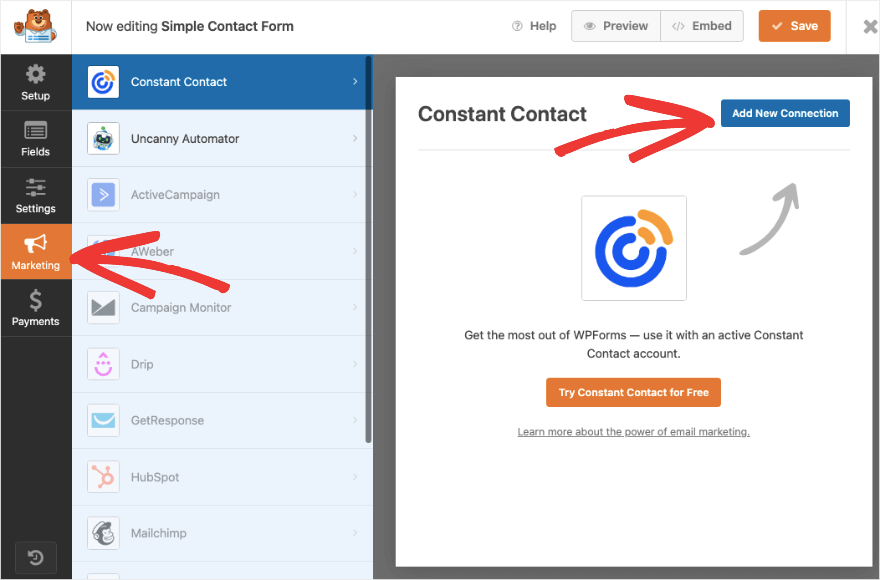
Under the Marketing tab on the left, you’ll get options to connect to popular email services like Constant Contact, AWeber, Drip, and more.
Follow the onscreen instructions to connect your account. Then you can tag and segment new leads too so your list stays organized.
Now you’re ready to publish the contact form on your site.
Step 5: Publish the Contact Form
WPForms makes it so simple to add the contact form to any part of your website such as a page, post, sidebar, or footer.
First, to add the form to an existing or new page or post, open the block editor. Use the Plus icon to add a new block and search for ‘WPForms’.
When you select WPForms, you’ll see a new block appear in your WordPress page or post with the WPForms mascot.
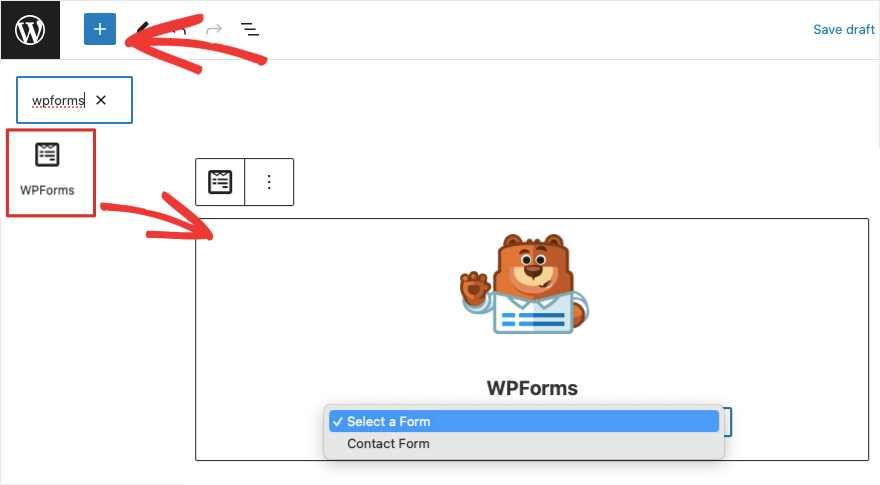
There’s a dropdown menu that contains all the forms you create with WPForms. Simply choose the contact form you just created. You can preview and publish your page or post for it to go live on your site.
In the Classic editor of WordPress, you’ll see an “Add Form” button at the top menu. This lets you add the form to your page.
If you want to add it to a widget-ready area such as a sidebar, go to the Appearance » Widgets tab. 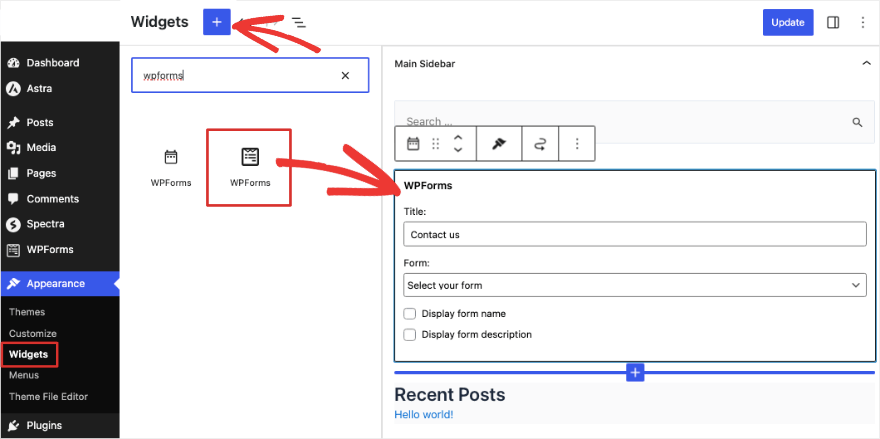
Like this, you can add it to your footer as well. You’ll find the WPForms block available in all popular page builders like SeedProd, Elementor, and Thrive Architect.
WPForms also supports shortcodes so you can use the code to embed your contact form anywhere on your website.
That’s it! You’ve successfully added a contact form to your WordPress site. If you’re on the pro plan, you can also manage all your form entries right from your WordPress dashboard. WPForms also shows you analytics about how your users interact with the form and how well its performing.
We hope you found this step-by-step guide helpful. If you’re sending out emails using your WordPress website, you’ll likely face email delivery failure issues. We recommend using WP Mail SMTP, it will resolve all those problems and ensure your emails are delivered.
Do you want to create a dedicated contact page? We suggest checking out SeedProd. It’s the best page builder plugin for WordPress. There are readymade templates and smart sections so you’ll find a contact section that’s already designed for you.
You can also prompt users to contact you by displaying a targeted popup at the right time and place. OptinMonster is the best tool for that.
Interested in learning more about how to use WPForms? Check out our complete WPForms tutorial »